Blog
Entertainment Venue Graphics: Choosing a Workflow
Choose an entertainment venue graphics workflow with guidance on surfaces, access, schedules, approvals, safety, quality checks, and quote-ready planning.
Blog
Choose an entertainment venue graphics workflow with guidance on surfaces, access, schedules, approvals, safety, quality checks, and quote-ready planning.
.
A venue graphics project can look straightforward on a floor plan and become complicated at the loading dock. Different surfaces, public access, artwork approvals, installation windows, and return-to-service requirements can all affect the right approach before a crew arrives.
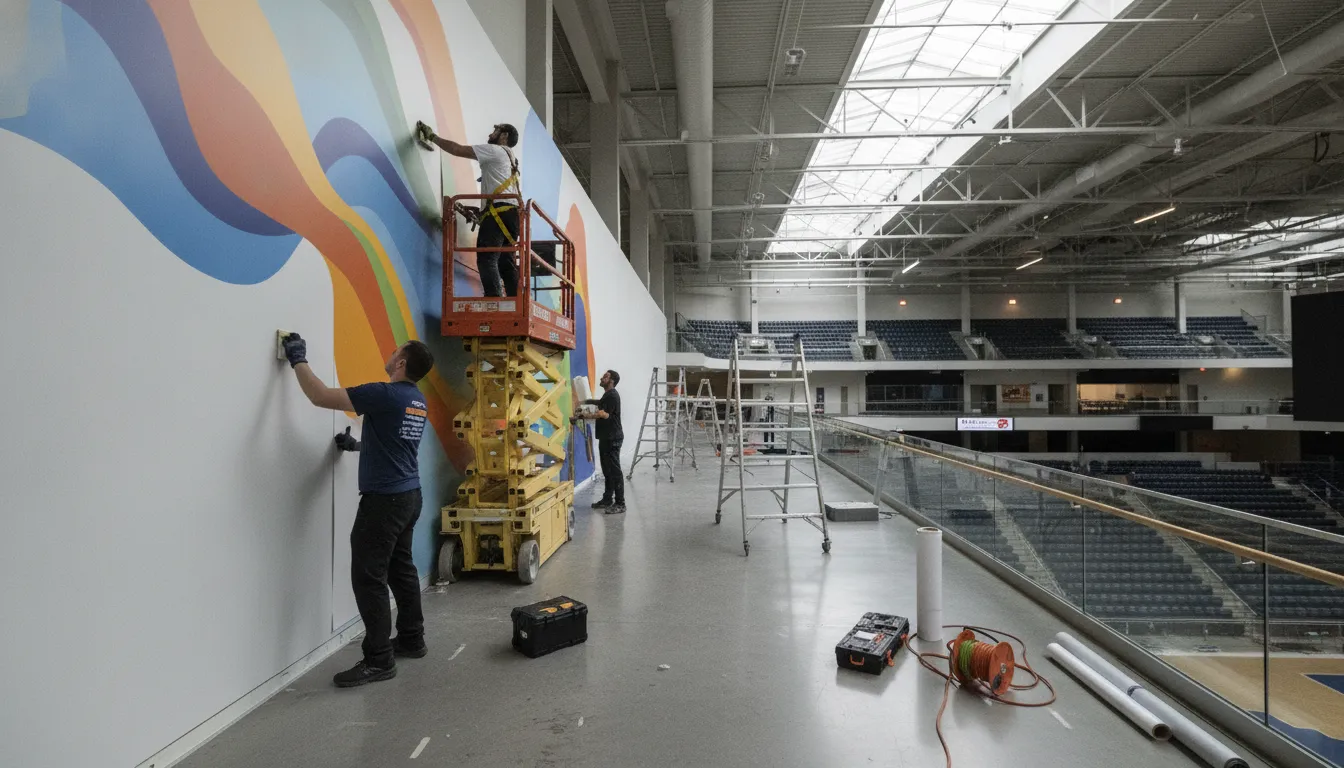
The best entertainment venue graphics workflow matches the graphic program to the venue's zones, surfaces, access rules, schedule, and coordination needs. Fixed branding, rotating sponsor graphics, temporary activations, and operational wayfinding each require different planning inputs, quality checks, and closeout records.
Start by defining what must be installed, where it will go, how guests and staff move around it, and who controls each decision. A clear scope makes it easier to compare workflows, identify risks early, and request pricing that reflects the real conditions of the project.
Request a quote for your entertainment venue graphics project.
Start by matching the installation workflow to what the graphics must do, how often they will change, and who controls the venue environment. A fixed brand environment needs a different approval and closeout process than sponsor graphics that rotate, a short-term activation, or operational wayfinding. This decision affects artwork preparation, substrate review, access planning, installation sequencing, and the information required for a reliable quote.
Entertainment venues may include theaters, stages, lobbies, promotional areas, and wayfinding zones, so treat the venue as a set of related workstreams rather than one undifferentiated wall package. Velocity identifies these venue areas as distinct applications, while live-production platforms may coordinate output across jumbotrons, halo boards, ribbon boards, concourses, and streaming feeds. Those display environments can require a production workflow separate from physical vinyl installation.
| Workflow. | Best fit. | Primary planning focus. |
|---|---|---|
| Fixed branding. | Permanent or long-term identity graphics in lobbies, walls, and guest-facing areas. | Surface readiness, approved artwork, durable materials, inspection, and documented handback. |
| Rotating sponsor or show graphics. | Programs with recurring campaigns, sponsors, or seasonal creative. | Repeatable file standards, zone mapping, approval ownership, and planned access windows. |
| Temporary activations. | Short-term launches, exhibitions, premieres, or branded experiences. | Defined install and removal dates, temporary surfaces, protection, storage, and restoration. |
| Operational wayfinding. | Directional, identification, accessibility, or event-flow signage. | Approved destinations, audience paths, dimensions, mounting conditions, and accessibility review. |
For wayfinding, a production-ready scope should identify destinations, audience paths, location plans, accessibility requirements, dimensions, and mounting conditions. For a broader installation package, link the decision to arena wall wrap installation planning when wall-wrap conditions and venue circulation need deeper review. Review professional vinyl graphics installation capabilities when the scope spans several surface types. A venue team should also confirm local access, safety, and accessibility requirements before the workflow is finalized.
A venue rarely has one uniform graphics environment. A lobby may need a polished first impression, while a stage backdrop, concourse banner, sponsor area, or guest path has different sightlines, access limits, and durability considerations. Start by mapping each zone to its audience, viewing distance, installation surface, and operating purpose before selecting materials or sequencing the work.
In lobbies and entry areas, prioritize walls, windows, directories, and reception graphics that support orientation without competing with security or ticketing operations. Stages and performance areas may call for scenic walls, backdrops, banners, or sponsor branding designed around sightlines and production equipment. Concourses and guest paths need a practical review of traffic patterns, mounting conditions, and the relationship between promotional graphics and directional information. Venue graphics providers commonly scope theaters, stages, lobbies, wayfinding, and promotions as related but distinct applications, rather than treating them as one package (venue-area planning examples).
Surface selection should follow the zone. Smooth walls may support a wall graphic or mural system after surface-readiness checks. Windows require a material and finish that preserve the intended balance of visibility and branding. Floors need products and protective finishes appropriate to foot traffic. Banners may require separate attachment and rigging coordination. Screen-adjacent areas deserve an additional handoff with the venue's production team so physical graphics do not obstruct displays, cameras, halo boards, ribbon boards, or concourse screens. These destinations can operate as part of one coordinated live-graphics environment, including jumbotrons, halo boards, ribbon boards, and concourses (venue display destinations).
For sponsor areas, confirm the approved placement, brand hierarchy, dimensions, and whether the graphic is permanent, seasonal, or part of a temporary activation. For directional elements, document approved destination names, audience paths, location plans, accessibility requirements, dimensions, and mounting conditions before production (directional-sign scope inputs). A zone-by-zone inventory gives the installer and print partner a usable production brief, reduces last-minute substitutions, and keeps the visual system consistent from arrival through the guest experience.
Use arena wall wrap installation planning when wall coverage and circulation are central to the scope. For a narrower event context, compare the concert venue graphics installation guide, then review professional vinyl graphics installation for broader surface and installation capabilities.
Venue graphics should support the visitor experience without narrowing routes, obscuring safety information, or creating confusion during a busy arrival or exit. Before installation, walk the proposed graphic zones with the venue operations team and document guest paths. Staff access, service corridors, emergency exits, stairs, ramps, doors, fire equipment, and areas that must remain clear.
Build the access plan around the actual venue, not a generic floor plan. The federal stadium evacuation planning guide identifies evacuation routes, pedestrian and vehicular traffic control, signage and lighting, and special-needs populations as planning topics. Those references are useful prompts, but they do not replace the venue's own emergency plan or instructions from local authorities. The owner or operator should customize procedures for its policies, local government requirements, surrounding community, and site conditions. See the arena wall wrap installation planning guide for related planning considerations around circulation, access, and closeout.
Accessibility review belongs in the artwork and site-survey stages, especially when a graphic is near a room, exit, restroom, stair, elevator, accessible route, or other identified space. The 2010 ADA Standards establish minimum scoping and technical requirements for newly designed, constructed, or altered public accommodations and commercial facilities. The standards also require accessible signs identifying certain accessible elements and spaces, as explained by the U.S. Access Board's signage guidance.
Do not assume that adding a branded panel to an existing sign makes it an accessible sign, or that every decorative graphic has the same requirements. Different content on one sign can be subject to different provisions. Covered signs may need visual specifications for people with low vision, while some categories also require tactile features for people who are blind or have low vision. Confirm the scope with the venue's accessibility lead and qualified project professionals before artwork is finalized. This is planning guidance, not a legal determination.
Translate the access review into an installation method statement. Identify the work zone, barriers, spotters, equipment staging, material route, permitted working hours, and handback standard. Coordinate any temporary diversion with venue operations, and keep accessible routes, egress paths, sightlines, and emergency communications under the venue's control. If installation occurs during public hours, define how guests, staff, contractors, and vendors will move around the crew. Photograph the area before work, then inspect the completed installation for lifted edges, exposed adhesive, blocked hardware, damaged finishes, and signs that are no longer visible or usable.
Venue graphics rarely involve only the installer. The schedule may depend on venue operations, event production, a print partner, brand leadership, facility management, and the people responsible for guest safety. Assign one owner for the installation brief, then confirm who approves artwork, releases the work area, controls access, and accepts the finished installation.
Start with the venue's access window rather than assuming a crew can work whenever the building is closed. Installation between performances may be possible, but the answer depends on the surface, crew size, equipment, access route, cure or dwell requirements, and the next scheduled use. A documented temporary event graphics timeline can help align production, delivery, installation, removal, and storage without turning this project into a generic changeover checklist.
Confirm that the venue owns or has approved the artwork and that the final files match the intended locations, dimensions, substrates, and finish. The print partner should provide a clear handoff package: labeled pieces, an installation map, revision status, quantities, and any notes about seams, overlaps, or special handling. If a last-minute graphic or location is added, record who authorized the change and whether it affects production, access, labor, or the return-to-service time.
Venue approvals should cover loading access, credentials, lift or ladder permissions, protective measures, work-area isolation, noise limits, and equipment staging. A stadium or entertainment operator must customize its plans to its own policies, local procedures, surrounding community, and site conditions, as noted in the CISA stadium evacuation planning guide. That makes the venue operations contact the authority for site-specific requirements, not a detail to resolve on installation day.
Before reopening the area, the crew and venue representative should inspect placement, edges, finish, damage, debris, equipment removal, and clear paths. Confirm that temporary barriers are gone, doors and service routes operate normally, and any guest-facing or safety-related elements remain visible and usable. Photograph the completed work, record punch-list items, and obtain handback approval from the designated venue contact. This simple closeout protects the schedule and gives every stakeholder the same record of what was installed, accepted, or deferred.
A useful brief gives the installer enough context to scope labor, materials, access, and coordination without filling gaps with assumptions. For entertainment venue graphics, include the following information in one working document:
Quality control should happen before the crew leaves, while the venue team, installer, and project owner can still review the work together. Start with the surface: confirm that graphics are adhering as expected, seams and edges are secure. And the finish is free from visible lifting, bubbles, wrinkles, adhesive residue, or damage. Review placement against the approved artwork, location plan, and any sightline or clearance requirements.
Complete a guest-facing walk-through rather than limiting the inspection to close-up views. Check the graphics from normal approach distances and from the primary audience paths. If the project includes directional or identifying signs, confirm that the installed content matches the approved destinations and that accessibility requirements have been addressed. The ADA Standards set minimum requirements for accessible public and commercial facilities. While ADA guidance notes that covered signs must meet visual specifications and that some sign categories also have tactile requirements. Those requirements depend on the sign's purpose and the venue's conditions, so the venue team should confirm the applicable scope. Review the ADA 2010 Standards and the Access Board sign guidance when applicable.
Take clear, dated photos of completed areas, including overall views, corners, seams, transitions, and any locations that required special preparation. Record open items in a punch list with the exact location, responsible party, and expected resolution. Keep notes on approved deviations rather than relying on verbal explanations.
Before handback, confirm that temporary protection, tools, waste, and access equipment have been removed, and that the area is ready for normal venue use. Review return-to-service conditions with the venue contact, including any restrictions on cleaning, traffic, or adjacent operations. CISA guidance emphasizes that stadium owners and operators should customize plans to their policies, local procedures, surrounding communities, and site specifics. Closeout documentation should reflect those venue-specific decisions. For a deeper inspection and handback framework, see this arena wall wrap installation planning guide.
Bring in a certified installation partner when the project needs more than straightforward graphic application. A specialist can help translate a creative plan into an installation workflow that accounts for surfaces, access, sequencing, and the people responsible for approving the finished work.
Multiple surfaces increase the need for technical judgment. A venue project may combine walls, windows, floors, padding, banners, or other graphic elements, each with different preparation and application considerations. Public access adds another layer. Guest circulation, accessible routes, safety requirements, and the venue's operating rules should be reviewed with the facility team before work begins.
This is especially relevant when graphics sit along busy concourses, near entrances, or in areas that must return to service quickly. A partner should be able to discuss surface readiness, installation sequence, protection of surrounding finishes, and the checks required before guests or staff use the space again.
A certified partner is also useful when the installation window is narrow or several stakeholders control the work. Venue operations, brand teams, event producers, designers, print vendors, sponsors, and facility contacts may each own part of the approval process. Establishing who supplies final artwork, who confirms access, and who signs off on completion helps prevent avoidable confusion at the venue.
For national programs, a partner with nationwide project capabilities can provide a consistent installation resource across locations while coordinating with each venue's local access and safety requirements. Requirements still need to be confirmed site by site; a national scope does not make every location identical.
Print shops, design firms, and agencies often need a specialist installer without handing the client relationship to a competing full-service agency. AP Installations works with those partners as a graphics application and installation resource. Its 3M Preferred Installer positioning reflects documented training, standards, and technical expertise, but project conditions still determine the appropriate materials, preparation, and quality checks.
If your team is managing a complex venue brief, review professional vinyl graphics installation and venue and sponsorship graphics projects to assess whether the installation partner's capabilities match the surfaces, locations, schedule, and stakeholder structure.
Request a project quote for entertainment venue graphics installation.
Yes. Review camera positions, screen content, lighting, glare, and priority photo views before approving scale, placement, and finish. This helps the graphics support the venue experience without competing with broadcast screens, creating reflections, or appearing unexpectedly in branded footage.
Sometimes, if artwork approval, proofing, production, venue access, safety planning, equipment needs, noise limits, and return-to-service timing are settled in advance. The venue team should confirm the access window and operating constraints before the crew is scheduled.
Replaceable panels, framed graphics, inserts, tension fabric, and backlit faces can support updates. The right choice depends on the graphic size, lighting, finish, access conditions, and how often the venue expects to change the creative.
Provide approved destination names, expected guest paths, a location plan, dimensions, accessibility considerations, and mounting conditions. The venue team should also confirm sightlines, egress routes, and any local safety requirements before fabrication and installation.
A clear project brief helps align venue access, graphic surfaces, timing, and coordination before installation begins. If your entertainment venue graphics project needs a practical workflow and defined next steps. Share the venue details, graphic scope, schedule, and any access or approval requirements with AP Installations.
Request a project quote for entertainment venue graphics installation.