Blog
Temporary Event Graphics Installation Timeline
Plan temporary event graphics installation from survey to removal with venue questions, access checks, and install-day timeline tips.
Blog
Plan temporary event graphics installation from survey to removal with venue questions, access checks, and install-day timeline tips.
Temporary event graphics installation succeeds when the schedule accounts for more than print delivery. Experiential marketers also need confirmed venue access, usable surface details, sponsor approval paths, install-day staging, and a removal plan that leaves the site ready for turnover. This guide turns those moving pieces into a practical timeline for venue graphics, sponsorship signage, wall decals, floor graphics, and temporary brand activations.
Planning an activation with multiple graphic touchpoints? Review AP Installations’ experiential graphics capabilities and build the install scope before production locks.
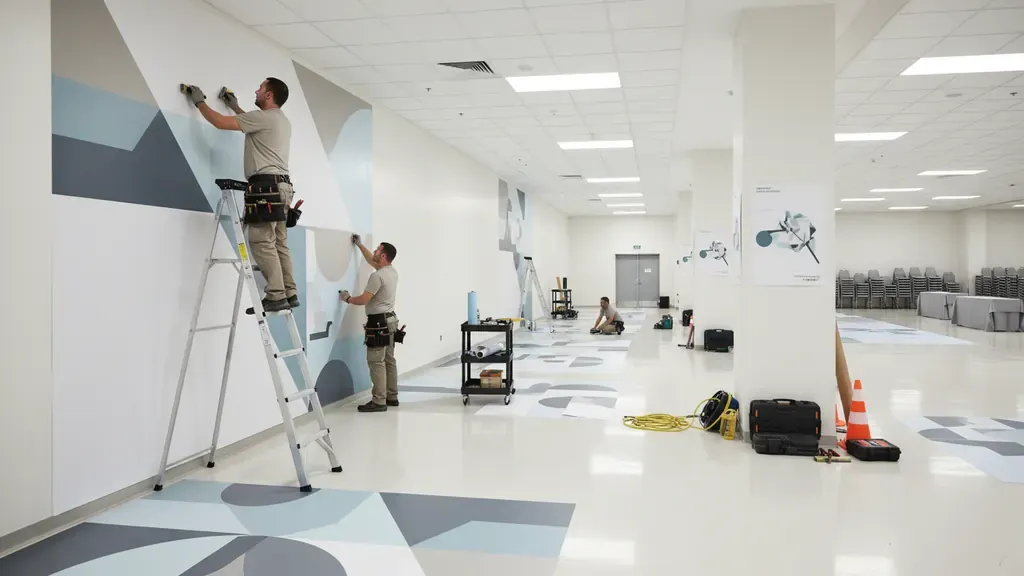
Temporary event graphics installation is the field execution of short-term branded materials inside or around a venue. The scope can include removable wall decals, sponsor panels, floor graphics, window graphics, scenic branding, directional graphics, elevator or column wraps, media backdrops, and other visual elements that support an activation without becoming permanent fixtures.
The installer is not only placing vinyl. A strong install plan translates creative intent into real venue conditions. It answers questions such as which walls accept removable adhesive, how much time the crew gets after load-in, whether lifts or ladders are allowed, who approves final sponsor placement, and how graphics will come down after the event. AP Installations’ experiential graphics installer guide explains why this field coordination matters when branded environments must open on time.
For marketers, the biggest risk is treating install as the final line item instead of an operating plan. When the venue, print partner, producer, and installer agree on timing early, the brand experience feels intentional. When they do not, crews lose time finding loading docks, waiting for access, or adjusting materials to surfaces that were never documented.
| Phase | Typical timing | Key decisions |
|---|---|---|
| Scope alignment | 4 to 8 weeks before event | Graphic zones, sponsor obligations, venue rules, target install window |
| Site survey | 3 to 6 weeks before event | Measurements, surfaces, access, obstructions, removal limits |
| Artwork and production release | 2 to 4 weeks before event | Final files, material choices, sequencing, labeling |
| Pre-install coordination | 3 to 7 days before event | Dock schedule, credentials, crew check-in, install order |
| Install day | Event load-in window | Surface prep, placement confirmation, punch list, photos |
| Removal and closeout | Immediately after or per venue schedule | Strike access, wall and floor condition, waste handling, sign-off |
This timing is a planning baseline, not a fixed rule. A compact lobby sponsorship package may need less lead time. A multi-zone convention, pop-up, or brand takeover with wall graphics, floor decals, and exterior windows may need more. If the activation shares similarities with trade show work, the trade show graphics installation planning guide offers a complementary checklist for aligning production and on-site conditions.
Start by mapping how guests enter, move, pause, photograph, and exit. That route reveals where graphics carry the most value. Entry glass can announce the experience. Floor graphics can guide attendees between check-in and a demo area. Sponsor signage can sit at camera-friendly zones. Wall decals can turn blank corridors or waiting areas into on-brand transitions.
During this phase, identify one owner for each approval category:
Marketers often plan graphics as a list of assets. Installers need them as a map of locations, surfaces, dimensions, sequence, and dependencies. For each graphic, record its venue zone, visible purpose, target surface, approximate size, and whether another vendor must finish first. That format makes the site survey faster and keeps production files aligned with reality.
A site survey is the quality-control step between the concept and the physical venue. It confirms dimensions, documents surface conditions, identifies obstructions, and flags workflow constraints before materials are printed. For temporary event graphics installation, the survey should cover both the graphic face and the route required to install it.
A clean photo library is useful. Wide photos show context, while close-ups reveal texture and edges. Measurements should note fixed landmarks, not only total wall length. For example, a sponsor wall should be measured from the floor, adjacent door frame, or ceiling transition so the graphics can be centered where guests will actually see them.
Install timing can unravel when access details are missing. Record loading dock location, freight elevator size, door widths, service corridors, parking limits, sign-in rules, badge requirements, and the exact window when crews may work. If the activation requires overnight installation or removal after attendees leave, get that approval in writing during survey follow-up, not during strike.
Need the survey converted into an executable install plan? Contact AP Installations before files go to print so venue realities can shape the schedule.
Material selection affects appearance, dwell time, removal, and venue acceptance. The creative may look straightforward on screen, but a removable wall film, floor graphic system, and window installation each face different conditions. The goal is not simply adhesion. The goal is appropriate performance for the event duration and clean, predictable removal.
Wall graphics must match the painted or finished substrate. Textured walls, fragile paint, recently painted drywall, and high-visibility lobby walls each warrant different conversations before production. If the venue cannot approve direct adhesive, the team may need to shift to a freestanding or alternative display approach rather than forcing a risky material decision late.
Floor graphics need to account for traffic flow, surface condition, cleaning cycles, and placement near turns or thresholds. A floor decal that works as a visual cue in a calm corridor may be poorly placed in a congested entrance queue. Plan the floor path around attendee behavior and venue safety feedback, not only around available blank space.
Sponsor deliverables usually have less tolerance for improvisation. Confirm final logo order, dimensions, required clear space, and whether stakeholders need to approve placement before permanent adhesion or final assembly. Assign this sign-off path before install day to avoid delaying a whole crew while a missing reviewer is tracked down.
The handoff from design and production to installation should make the venue layout obvious. A complete package includes the approved art, scale drawings or location photos, a placement map, graphic IDs, quantities, finishing notes, and a sequencing plan. If panels assemble in a specific order, the packaging and the install map should use the same naming system.
Useful production handoff details include:
Good labeling saves hours. A venue with twenty graphics should not require an installer to open every roll to identify a wall. When assets are packed by zone and the map mirrors those zone labels, the crew can stage materials efficiently, work in parallel, and protect delicate sponsor pieces from unnecessary handling.
Every event venue has operating rules. Ask direct questions early so creative and production are not built on assumptions. These questions are especially useful for temporary event graphics installation:
Capture answers in the master schedule. Venue rules only help if they appear where producers, print partners, and installers will actually use them. A single live document is better than details scattered through separate email threads.
Install day is easier when the crew arrives to a verified work environment. The schedule should include access time, staging time, surface review, installation sequence, stakeholder review, punch-list corrections, and documentation. A realistic schedule gives each step room instead of assuming graphic placement begins the instant the crew arrives.
Coordinating multiple branded zones? Use AP Installations’ experiential planning guidance to clarify install roles before doors open.
Event teams sometimes ask for new placements on the fly. Build a decision rule for changes. If a change affects sponsor obligations, venue restrictions, material suitability, or guest safety, pause for approval from the named owner. That brief pause protects the opening more than a hurried guess.
Removal is part of temporary event graphics installation, not an afterthought. The strike plan should list when crews return, how they re-enter the venue, which graphic zones clear first, what tools are allowed, how materials are disposed of, and who confirms the venue is returned in acceptable condition.
Removal planning matters most when a venue has a tight turnover, when flooring must be cleared before cleaning equipment returns, or when wall and glass areas need a quick final inspection. If graphics will remain for a multi-day activation, note the exact end time and whether any areas require daily inspection before attendees enter.
A clean removal plan also protects the brand relationship with the venue. Marketing teams may remember the opening moment, but facilities teams remember whether the strike respected access windows, left adhesive residue concerns unresolved, or created delays for the next event.
The differentiator is disciplined coordination. Existing general event graphics articles often focus on creative impact or asset types. This guide is intentionally narrower: it helps experiential marketers turn temporary venue branding into a timeline that installers, producers, sponsors, and venue teams can actually execute.
Temporary event graphics installation is easiest when planning begins while the activation is still taking shape. The installer can flag surface questions, help anticipate access constraints, and turn a broad visual brief into a venue-ready execution plan. That reduces late artwork changes, wasted production time, and opening-day stress.
For an example of venue-focused execution, review AP Installations’ Hillsboro Hops Stadium graphics and sponsorship signage project.
AP Installations supports experiential graphics, temporary brand activations, wall and floor graphics, and related installation planning for teams that need the brand environment to be ready when the event starts. For broader capabilities, see the graphics installation solutions overview. To discuss an upcoming venue project, contact AP Installations.