
Storefront Graphics Permit Checklist for Retail Window and Exterior Vinyl Installations
A storefront graphics permit checklist helps retailers catch approval, code, visibility, and scheduling issues before window graphics or exterior vinyl reach the installation date. The checklist matters because a design can look ready in a proof and still be delayed by a lease clause, a local sign review, an obstructed sightline, or missing removal language for a short campaign.
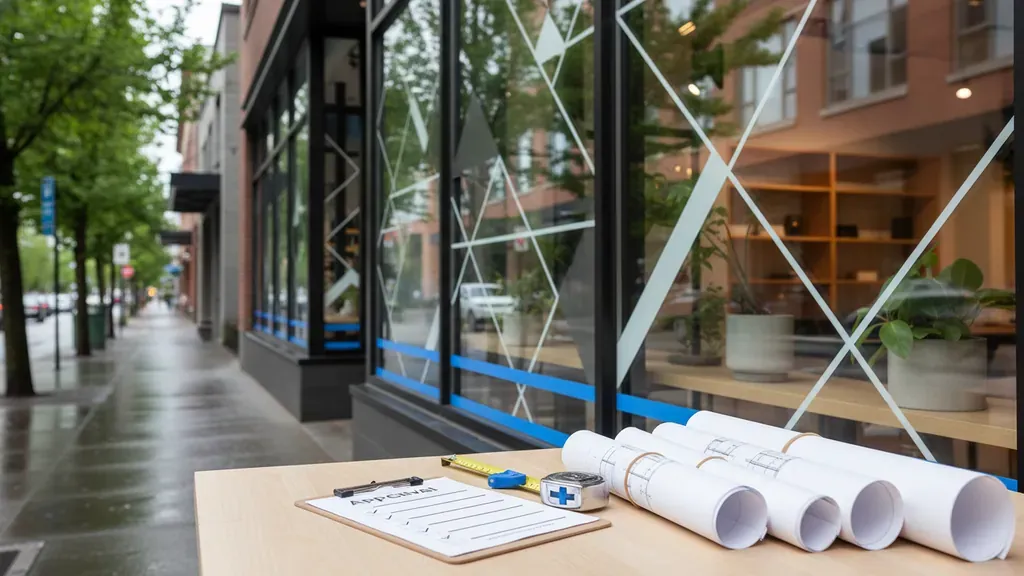
Planning retail window graphics now? Contact AP Installations before production so the installation scope, storefront conditions, and timing are clear.
This guide is built for business owners, marketing teams, franchise operators, agencies, and print partners preparing storefront decals, window displays, perforated vinyl, opaque films, or exterior graphics. It is not legal advice, and permit rules differ by jurisdiction. Use it as a practical pre-installation workflow, then confirm requirements with the property manager and the local authority having jurisdiction.
What should a storefront graphics permit checklist cover?
A useful storefront graphics permit checklist should answer seven questions before files go to production:
- Who must approve the graphics before work starts?
- Does the city, county, district, or shopping center treat the graphics as regulated signage?
- Do the graphics affect visibility, exit paths, driver sightlines, or required transparent glazing?
- Are drawings, dimensions, photographs, materials, and placement notes ready for review?
- Is the vinyl material appropriate for the glass, exterior surface, duration, and removal plan?
- Can installers access the storefront during the approved work window?
- Who approves proof of completion and future removal?
Those questions keep the conversation focused. Some storefront window graphics are treated as temporary promotional displays. Others are reviewed as signs because they cover a percentage of glazing, face a public right of way, include business identification, or sit in a controlled retail center. Exterior vinyl placed on walls, doors, awnings, or facade elements may follow a different review path than graphics applied only to glass.
For broader design, coverage, privacy, and installation considerations, AP Installations also explains business window graphics and offers a detailed commercial window graphics guide. To move from permitting to execution, review our retail graphics installation services.
Step 1: Confirm landlord, property manager, and brand approvals
Start with the approvals that are closest to the storefront. Retail tenants often need written landlord or property manager approval before a city will evaluate the sign package. Multi-tenant centers may also have architectural criteria that limit colors, placement, coverage, illumination, or how far a graphic can extend from a designated sign band.
Checklist for property approval
- Review the lease, sign criteria, tenant improvement manual, and any shopping center design standards.
- Confirm whether the property manager must submit the request or simply approve it.
- Identify rules for storefront windows, entrance doors, transoms, sidelites, and adjacent facade areas.
- Ask whether temporary sales campaigns follow a different approval route from permanent branding.
- Save approval emails, marked proofs, and application forms in one project folder.
Do not assume that a window graphic is exempt just because it is inside the glass or removable. Some property guidelines review interior graphics placed close to the storefront because they change the public-facing appearance of the tenant space.
Step 2: Ask whether a local sign permit or design review applies
Permit rules are local. A city may evaluate window signage by square footage, percentage of glass covered, street frontage, tenant occupancy, historic district status, or whether the display is temporary or permanent. A business improvement district, downtown design district, or architectural review board may add another layer.
The fastest path is usually a concise inquiry that includes the storefront address, landlord status, proposed graphic type, approximate dimensions, installation surface, and whether the graphic is temporary. Ask which department reviews it, which form applies, and whether a permit number or inspection is required before installation.
Questions to ask the reviewing office
- Are retail window graphics, perforated vinyl, opaque window decals, or exterior wall-applied vinyl regulated as signs at this address?
- Is there a maximum window coverage percentage or square footage limit?
- Are temporary promotions, seasonal graphics, and grand-opening graphics handled differently?
- Do drawings need to show the full storefront elevation and neighboring tenant context?
- Is owner authorization required with the application?
- Are there historic district, pedestrian safety, or visibility standards to address?
- Must installation wait until a permit is issued, or is review advisory?
If the project brief is approved but the permit path is unclear, contact AP Installations to align the graphics installation scope before the schedule tightens.
Step 3: Build a review-ready storefront graphics submittal
Reviewers cannot approve what they cannot visualize. A strong submittal removes guesswork and reduces the chance of requests for revised documents. Even when a permit is not required, these materials help the landlord, marketing team, printer, and installer work from the same information.
Documents to gather
- Storefront photographs: Current, straight-on images showing windows, doors, frames, mullions, and nearby signs.
- Elevation or marked photo: A visual that shows exactly where each graphic element will sit.
- Dimensioned artwork: Width, height, total area, and placement measured from visible storefront features.
- Material notes: Film type, opacity or perforation, laminate if applicable, and intended interior or exterior placement.
- Installation method: Surface preparation, access assumptions, ladder or lift needs if exterior areas are involved.
- Duration: Permanent, seasonal, event-based, or limited campaign dates.
- Removal plan: Who removes the graphics, approximate timing, and whether the surface must be restored.
- Owner or manager authorization: Written approval when required.
For exterior vinyl beyond windows, include the exact surface type. Painted masonry, metal panels, ACM, glass, and textured walls do not behave the same way. A permit reviewer may only need the drawing, but the installer needs material and surface information to keep the finished project practical.
Step 4: Check storefront visibility, safety, and customer experience
Graphics should work for the customer experience as well as the approval process. A full-coverage design that looks strong on screen may reduce staff visibility, block interior merchandising, hide entrance cues, or conflict with a local transparency requirement. Retail teams should evaluate how the storefront functions from both sides of the glass.
Visibility and safety review
- Keep door handles, entrance instructions, and operating hours legible.
- Confirm graphics do not interfere with emergency egress signage or required safety markings.
- Evaluate line of sight from the sales floor to the sidewalk and parking area where that matters operationally.
- Check whether transparent, perforated, translucent, or solid films are appropriate for the intended effect.
- Review daytime and evening visibility if the storefront is lit from inside.
- Account for mullions, window seams, and door movement so important design elements are not split awkwardly.
A retailer does not need every piece of glass to carry the same graphic density. A balanced storefront can combine high-impact branded panels, clear product sightlines, door information, and promotional copy while still protecting visibility. AP Installations covers these practical choices in its guide to commercial window graphics for business spaces.
Step 5: Choose materials that match the permit, surface, and campaign length
Permit documents often show what the graphic will look like, but a successful installation also depends on selecting the right film. Retail teams should define whether the objective is one-way visibility, privacy, bold opaque branding, short-term promotion, or long-term storefront identification. The design, substrate, sun exposure, maintenance expectations, and removal timing all influence that decision.
| Project need | Planning question | Why it matters |
|---|---|---|
| Promotional window decal | How long should it stay up? | Short campaigns need removal expectations defined before installation. |
| Perforated storefront film | Is outward visibility more important than interior light transmission? | Coverage, sightlines, and evening appearance must be reviewed early. |
| Opaque branded window panel | Will coverage trigger a landlord or local sign limit? | Solid areas may be counted differently than transparent zones. |
| Exterior wall or facade vinyl | What surface and access conditions are present? | Texture, coatings, weather, and lift access can change the install plan. |
Material selection should happen before the final permit packet is frozen. A late change from translucent film to opaque coverage, or from interior glass application to exterior wall vinyl, may require a revised review.
Step 6: Schedule installation around approvals, retail hours, and access
A complete permit checklist ends with a real installation plan. Retail storefront work is often tied to an opening date, promotion launch, tenant turnover, or multi-location refresh. Approval delays matter, but so do installer access, weather, lift permissions, power availability, and keeping customer entrances usable.
Installation scheduling checklist
- Do not release final installation dates until required approvals are issued or clearly documented as not required.
- Confirm whether work must happen before opening, after closing, or during a low-traffic window.
- Secure access contacts, alarm instructions if relevant, loading guidance, and parking notes.
- Check whether the property requires certificates, vendor registration, or lift approvals.
- Account for glass cleaning, removal of old decals, adhesive residue, or surface repairs before new film is installed.
- Plan photo documentation of the finished storefront for closeout.
Need to turn an approved storefront concept into a clean field plan? Explore AP Installations’ business window graphics capabilities and coordinate installation details early.
Step 7: Include the removal plan before the first panel is installed
Removal is easy to overlook when a graphic is tied to a launch, sale, or seasonal campaign. It belongs in the initial checklist. Property managers may ask who is responsible for returning glass or exterior surfaces to an acceptable condition. Brand teams need to know when the campaign ends. Installers need to know whether the next phase involves removing, replacing, or layering graphics.
- State whether the graphics are permanent or temporary.
- Set a target removal or reevaluation date for time-bound campaigns.
- Define who authorizes removal and who schedules it.
- Document any surface restoration expectations in the property approval.
- Keep final artwork, dimensions, and installation photos for future refreshes.
This step is especially helpful for retail groups that reuse a campaign format across stores. A documented removal plan keeps future rollout phases from inheriting avoidable questions.
Storefront graphics permit checklist by phase
| Phase | Checklist items | Output |
|---|---|---|
| Discovery | Address, lease rules, sign criteria, district considerations, project duration | Approval path and open questions |
| Design review | Storefront photos, elevation, dimensions, coverage, material direction | Property manager package |
| Permit review | Authority contact, forms, owner authorization, required drawings, fees if applicable | Permit decision or documented exemption |
| Production handoff | Approved art, final sizing, substrates, install method, removal plan | Print-ready and field-ready package |
| Installation | Work window, access, safety, surface preparation, installer documentation | Completed storefront graphics |
| Closeout | Completion photos, approval archive, maintenance or removal date | Reusable project record |
Common mistakes that delay retail graphics approvals
- Starting with production instead of approvals: Printed graphics are expensive to revise after a reviewer asks for less coverage or a different placement.
- Using vague dimensions: “Full front window” is not a permit-ready measurement.
- Ignoring the lease: A city answer does not replace tenant sign criteria.
- Forgetting interior graphics near the storefront: Some review bodies care about visible graphics even when they are behind glass.
- Leaving removal undefined: Temporary graphics should not become a future operations problem.
- Separating the design and installer conversation: Practical access, seams, surface conditions, and sequencing should inform the final package.
These mistakes are avoidable when the checklist belongs to the project from the first design review. Retail teams that manage storefront graphics as an operational workflow, rather than only a creative asset, make better schedule decisions.
Frequently Asked Questions
Do storefront window graphics always need a permit?
No. Requirements vary by location, property, graphic size, placement, and whether the local jurisdiction treats the application as signage. Ask the reviewing authority and property manager before production.
What documents are commonly useful for a storefront graphics review?
Prepare storefront photos, a marked elevation or rendering, exact dimensions, artwork, material notes, owner authorization if required, proposed installation location, and the intended duration or removal plan.
Should landlord approval happen before city sign review?
Often, yes. Many commercial properties require tenant sign approval first, and some jurisdictions ask for owner authorization as part of a permit submittal. Follow the process for that address.
Can temporary promotional window graphics have different rules?
Yes. Temporary graphics may use a different form, have duration limits, or be reviewed differently from permanent storefront identification. Confirm the treatment before scheduling installation.
Why include the installer before permits are finished?
An installer can flag surface, access, seam, timing, and removal details while revisions are still manageable. That reduces the chance that an approved design becomes difficult to execute cleanly in the field.
Use the checklist to protect the schedule and storefront result
A storefront graphics permit checklist keeps retail graphics projects organized from first concept through closeout. It gives property managers a clearer request, gives local reviewers the information they need, and gives installers a better field package. Most importantly, it prevents the opening date or campaign launch from depending on details that should have been settled weeks earlier. See our completed storefront and retail graphics projects for examples of finished installation work.
If your team is planning storefront decals, retail window graphics, or exterior vinyl installations, contact AP Installations to discuss the installation scope and project timing.