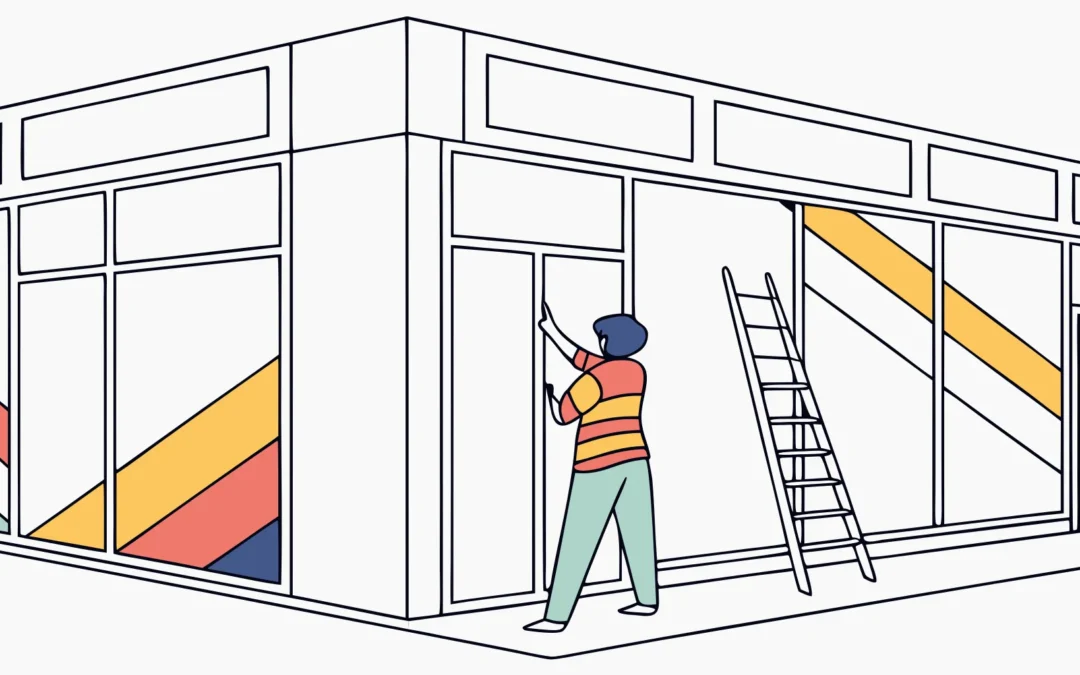
A strong retail rebrand must survive the jump from a design file to every storefront. Vinyl graphics make that rollout practical across walls, windows, floors, and other customer-facing surfaces.
Discuss your retail rebrand with AP Installations.
Retail store rebranding vinyl graphics carry one updated identity across storefront windows, interior walls, floors, and displays. A successful rollout defines brand standards, audits each site, matches materials to surfaces, coordinates production and installation, and inspects every location. Working with a 3M Preferred Installer helps protect consistency and warranty eligibility.
The right plan must protect the brand, the surfaces, the schedule, and the customer experience at every active retail location. Before mapping the full rollout, we first answer the practical question: Why vinyl graphics work for a retail rebrand. Here is how.
Why vinyl graphics work for a retail rebrand
A retail rebrand must make the new identity clear across the whole store. Vinyl graphics can carry one visual system from the storefront to walls, floors, and key displays. This range helps the space tell a consistent story instead of showing a set of unrelated signs.
Visual identity can shape how customers respond to a changed brand. Research on consumer response to visual brand identity in rebranding supports treating each visible surface as part of the plan. Retail store rebranding vinyl graphics connect that plan to the physical space customers use.
A coordinated path through the store
Each surface has a different job. Retail window graphics introduce the new look before a customer enters. Wall graphics can set the mood or explain a brand story, while floor graphics can guide movement toward products or service areas.
- Windows can announce the new identity and current campaign.
- Walls can create branded zones around products or services.
- Floors can support wayfinding and lead shoppers through the space.
- Counter and display graphics can reinforce key messages near decisions.
Used together, these elements create a clear sequence. Customers see the brand outside, move through it inside, and meet the same colors and messages at each step. That continuity makes the rebrand easier to understand during a normal store visit.
Flexible coverage for existing spaces
Vinyl gives a brand team several ways to update a store without relying on one type of surface. The same design system can be adapted to glass, painted walls, selected floors, and fixtures. A site assessment should still confirm surface fit and local conditions before production begins.
This flexibility also lets teams focus attention where it matters most. A full wall mural may define a main area, while smaller graphics support departments and displays. The result can feel complete without placing the same message on every surface.
One system across every customer touchpoint
A strong rebrand aligns more than logos. Type, color, imagery, tone, and wayfinding should work as one system throughout the visit. Planning retail store rebranding with vinyl graphics helps teams assign a clear purpose to each surface.
That shared system also supports store-to-store consistency. Teams can define the main visual parts once, then adapt their size and placement for each location. Customers still meet the same brand cues, even when layouts and surfaces differ.
Retail store rebranding vinyl graphics: step-by-step
A clear process keeps retail store rebranding vinyl graphics consistent from the first survey through final sign-off. It also helps teams catch costly gaps before printing starts. Visual identity can shape how shoppers respond to a rebrand, according to research on visual brand identity and consumer response.
Planning the rebrand
Start by naming the business goal, the spaces in scope, and the people who can approve changes. Then build one shared brief for the brand team, printer, installer, store manager, and project lead. This brief should define who owns each choice and when approval is due.
-
Set goals and scope. Define what the rebrand must achieve, such as a new identity, clearer wayfinding, or a seasonal reset. List every store, surface, graphic type, and deadline in scope.
-
Audit each site. Record wall finishes, window conditions, floor traffic, access limits, and any old graphics that need removal. Note heat, moisture, direct sun, and other conditions that may affect the vinyl.
-
Measure and photograph surfaces. Capture exact widths, heights, obstacles, seams, and sightlines. Label every photo and measurement with its store, zone, and surface ID to prevent mix-ups.
-
Apply design standards. Build artwork from approved colors, type, logos, scale rules, and placement guides. Include trim, bleed, panel overlaps, and safe zones in the production files.
-
Confirm material specifications and proofs. Match the vinyl, adhesive, laminate, and finish to each surface and setting. Review scaled proofs, full-size details, color samples, and a test application before approving production.
-
Plan production and installation. Set print, shipping, access, removal, and install dates around store operations. For larger programs, use a multi-location installation plan with the same file names, checklists, and sign-off rules at every site.
-
Install and inspect. Prepare each surface, place graphics against approved drawings, and document the finished work. Check alignment, edges, seams, bubbles, color, and site cleanup before the crew leaves.
Production controls
The project lead should release files only after the site data, design, material choice, and proof agree. A single revision log helps prevent an old logo or wrong size from reaching print. It should show the file name, version, approver, and approval date.
Packaging needs the same care. Mark every roll or panel with its site, zone, surface ID, and install order. For more detail on applications across walls, windows, and other store areas, review this guide to retail store rebranding with vinyl graphics.
Installation quality checks
Give installers approved drawings, site contacts, access notes, safety rules, and a clear escalation path. Schedule work around customer traffic when possible. If a field condition differs from the survey, pause that area and get approval before changing the plan.
Final QA should compare the installed graphics with the proof and placement drawings. Record defects, assign fixes, and capture close-up and wide-view photos after corrections. Store those records with the site survey and approvals, so later repairs or rollouts can follow the same standard.
Plan windows, walls, and floors as one system
Retail store rebranding with vinyl graphics works best when every surface supports one clear customer journey. Windows attract attention, walls build the brand story, and floors help guide movement. Planning them together keeps colors, messages, and visual weight consistent from the sidewalk to the checkout.
A clear job for each surface
Start by deciding what shoppers should notice, learn, or do at each point in the store. Window graphics can introduce the new identity before entry, while wall graphics can give it depth inside. Floor graphics work best as short prompts or wayfinding cues that people can grasp while moving.
These roles should connect without repeating the same message everywhere. A strong window promise can lead to a wall display. A floor cue can then direct shoppers toward it. This joined approach matters because visual brand identity affects consumer response during rebranding.
| Surface | Primary job | Surface checks | Design focus |
|---|---|---|---|
| Windows | Draw attention and set expectations | Glass condition, seals, tint, and sightlines | Readable copy and planned open space |
| Walls | Build atmosphere and explain the brand | Paint type, texture, repairs, and moisture | Scale, viewing distance, and fixture placement |
| Floors | Guide movement and mark key zones | Floor finish, wear, cleaning, and traffic | Short messages and clear directional cues |
Material choices follow the surface
The same artwork does not mean the same vinyl or install method. Smooth glass, painted drywall, textured walls, and sealed floors each create different demands. A site assessment checks surface condition and nearby factors before print production begins.
Windows also need a plan for visibility from both sides, daylight, and door hardware. Walls require close checks around corners, outlets, shelving, and uneven paint. For more detail on balancing visibility with store access, review these retail window graphics considerations.
Floor graphics face steady foot traffic, cleaning tools, and spills. Their placement should avoid damaged areas and spots where standing water may collect. Material selection must match the floor finish and planned use. These checks reduce lifting edges and help preserve a neat appearance.
One coordinated installation plan
Build the install sequence around how the store operates. Crews may need to finish high wall areas before fixtures return. Floor graphics should follow other work that could mark them. Windows often come last so the new look appears at the planned reveal.
Review every surface together before approving print files. This check can catch a wall message hidden by shelving or a floor cue blocked by a display. It also helps teams set a clear visual order, so key messages stand out without making the store feel crowded.
Document the approved art, exact placement, surface notes, and material for every graphic. This record helps crews resolve conflicts before installation and keeps later locations aligned. AP Installations can also support design and print coordination services when several surfaces or partners share the project.
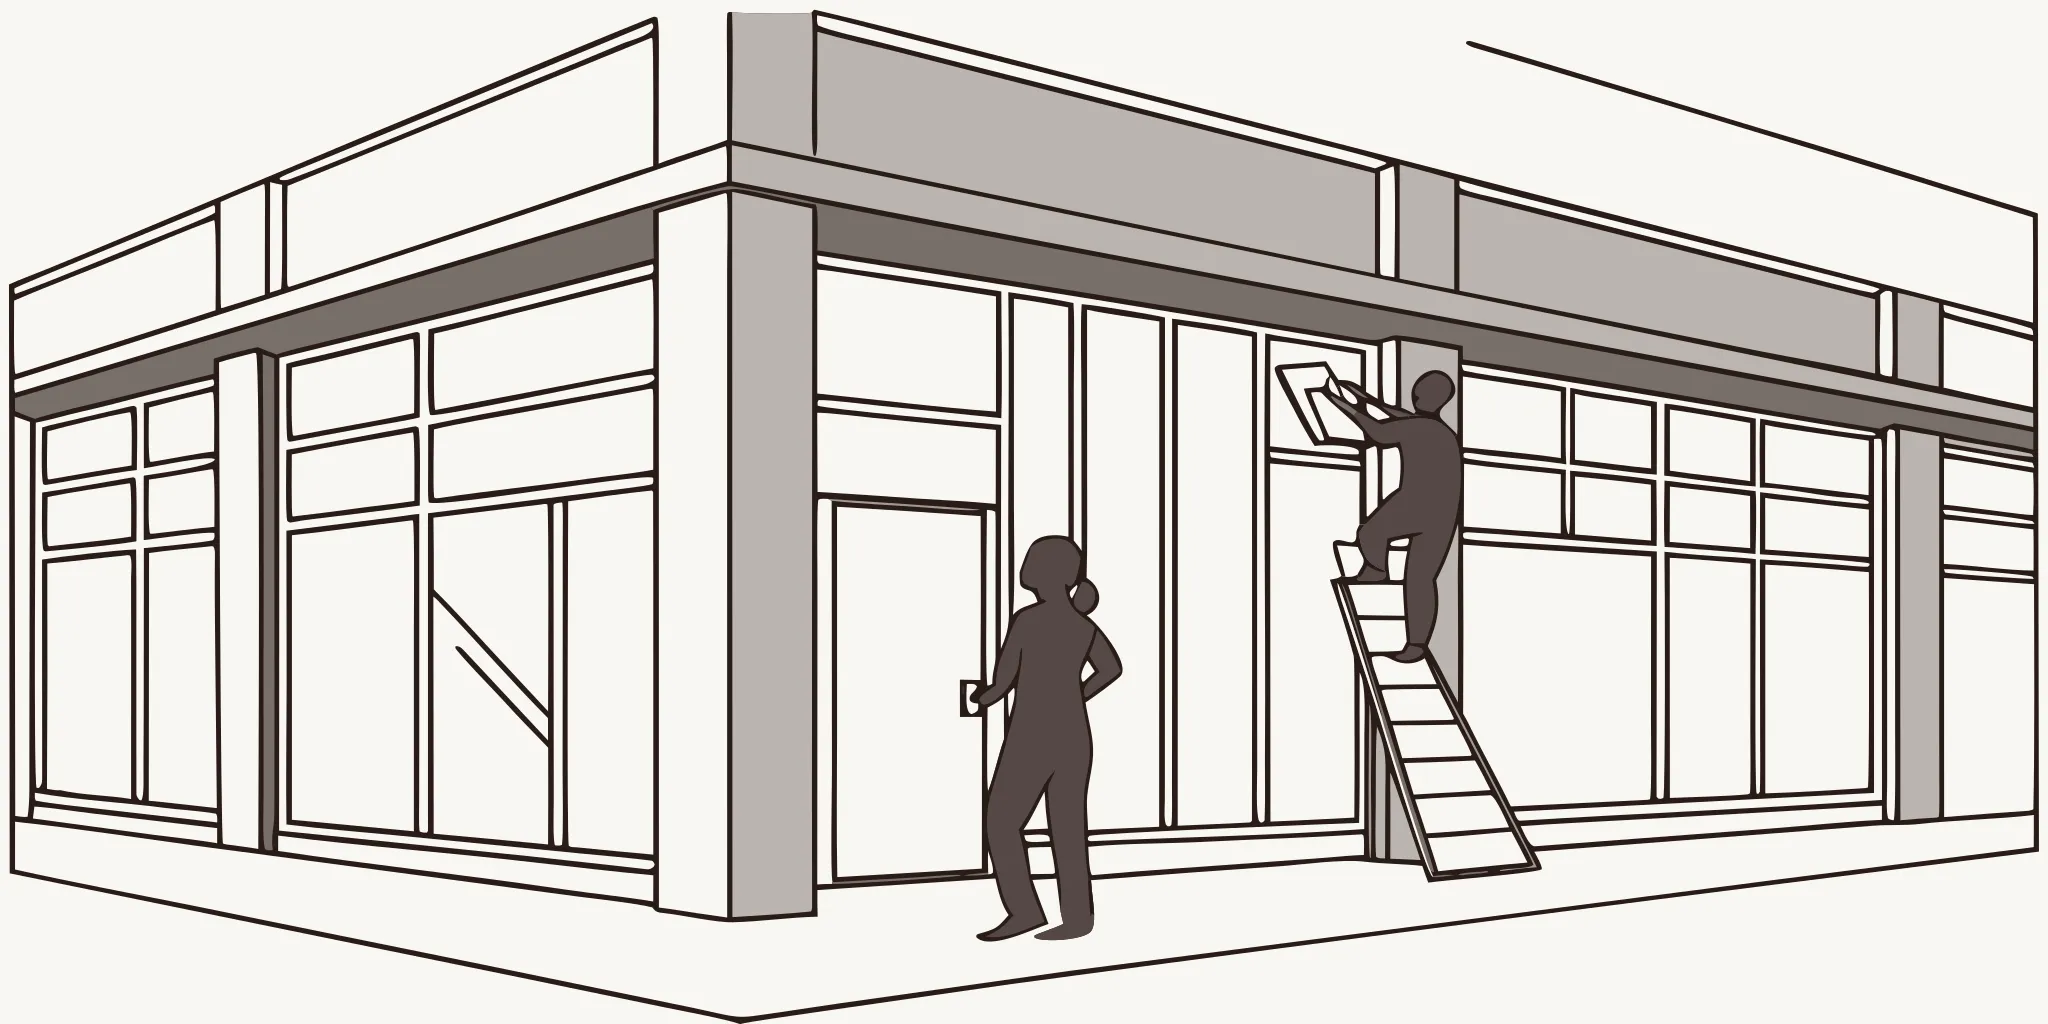
How do you prepare a store for installation?
Preparing a store for retail store rebranding vinyl graphics starts well before installers arrive. A careful plan protects the new graphics, keeps people safe, and limits disruption to daily trade.
Site survey and surface checks
Start with a site survey that maps every wall, window, floor, sign, and access point. Record dimensions, surface types, damage, outlets, fixtures, and any areas installers cannot reach safely. A clear survey helps the print and installation teams spot issues before production.
Next, confirm that each substrate suits the planned film and adhesive. Old vinyl, loose paint, rough masonry, sealants, grease, or moisture can weaken the bond. Clean each surface with the approved method, then let it dry fully before work starts.
- Identify graphics that need removal and check what lies beneath them.
- Test painted or coated surfaces in a small, hidden area.
- Mark fragile fixtures, active alarms, sprinklers, and electrical equipment.
- Confirm lift access, loading areas, storage space, and waste handling.
Environmental, permit, and safety planning
Temperature, humidity, direct sun, and airflow can affect how a graphic handles during installation. Check indoor climate controls and note exterior areas exposed to rain, wind, or strong sun. For exterior or public-facing graphics, confirm permit needs and property rules before setting an installation date.
Confirm who controls doors, alarms, lifts, electrical systems, and restricted areas. Complex work may also need barriers, warning signs, or a safe route around the crew. Set one site contact who can answer questions and approve small field changes.
Scheduling around store operations
Build the work plan around deliveries, peak shopping periods, staff shifts, and neighboring tenants. Schedule removal, cleaning, and installation in the right order so prepared surfaces do not sit exposed. Off-hours work, including evenings or weekends, can keep aisles open and reduce customer disruption.
For a chain-wide project, use the same checklist and photo standards at every location. A detailed multi-location installation plan helps teams repeat the approved setup across stores. Protect merchandise and floors, then set aside a clean area where installers can stage labeled graphics.
If the visual change is substantial, prepare staff messaging before installation. A published rebranding study found that explaining why a brand changed can help limit losses in trust and purchase intent. Brief staff on the schedule, blocked areas, and how to direct customer questions.
Get expert help planning graphics for every retail location.
Keep a multi-location rollout consistent
A multi-location rollout should make every store feel like part of the same brand. That result depends on a clear plan, repeatable standards, and room for site needs. Start by setting the scope, approval path, schedule, and quality checks before production begins.
A practical rollout playbook
Create one standard operating procedure for every team involved in the rollout. It should define approved artwork, materials, color targets, placement rules, and install methods. A shared multi-location installation checklist keeps print partners, installers, store managers, and brand teams aligned.
- List each graphic, its final size, material, finish, and approved artwork file.
- Set naming rules for files, stores, shipping labels, photos, and status reports.
- Define who approves changes, resolves field issues, and signs off on completed work.
- Use one photo standard so every store has clear before-and-after records.
Consistency matters because shoppers see the new identity through many separate brand details. Research on visual brand identity and consumer response also shows why those details deserve careful control. A playbook protects that identity when work moves across cities, crews, and store formats.
Site-specific planning
A standard plan still needs a site survey for each location. Walls, windows, floors, lighting, access points, and local rules can vary from store to store. Record those conditions early, then approve any changes before graphics enter production.
The survey should also note loading access, storage space, store hours, permits, and safety limits. With that information, the project manager can group shipments and set install windows. Crews can work during off-hours when needed, which helps reduce disruption for staff and shoppers.
Adaptations should solve a real site issue without changing the brand system. For example, a smaller window may need a scaled layout, but its spacing and key message should stay consistent. Document each approved change so production and field teams use the same version.
Punch lists and project control
Each completed store needs a punch list, not just a general sign-off. Check graphic placement, alignment, seams, edges, color, surface bond, and cleanup. Compare completion photos with the approved proof, then assign a clear owner and due date for each correction.
A single point of contact keeps decisions from getting lost across locations. That person tracks production, shipping, schedules, field changes, punch items, and final approvals. Central design and print coordination also helps keep retail store rebranding vinyl graphics consistent from the first site through the final install.
Why does installer certification matter?
A disciplined site assessment
Certification gives a retailer a useful way to screen for trained installation practices. Before work starts, a qualified installer checks each surface, its condition, and the surrounding environment. That review can reveal paint, texture, moisture, access, or temperature issues that may affect the job.
These findings guide material choices, surface preparation, and the installation plan. They also help the team spot gaps before graphics reach the site. For retail store rebranding with vinyl graphics, that early check lowers the risk of delays, waste, and uneven results.
Specifications and warranty eligibility
A 3M Preferred Installer follows product specifications rather than relying on one method for every surface. The installer checks that the planned film, adhesive, laminate, and application method suit the setting. This discipline matters because warranty eligibility may depend on approved products, correct use, and a documented process.
AP Installations’ 3M Preferred Installer status can provide access to the 3M MCS Warranty for eligible projects. Coverage is not automatic, and its terms vary by product, application, and project details. Retailers should confirm the exact warranty terms in writing before approving production or installation.
Documentation and rollout control
Certification also supports a more consistent record of the work. Useful records can include site notes, measurements, surface conditions, approved specifications, photos, and completion details. If a problem appears later, this file helps the project team trace what was installed and how.
- Site assessment notes show known conditions before installation.
- Approved specifications keep printers, installers, and brand teams aligned.
- Progress photos document key stages and completed graphics.
- Completion records make follow-up work easier to plan.
That control becomes more valuable when many stores must change on one schedule. A clear process helps each crew follow the same scope while allowing for site-specific needs. AP Installations’ guide to multi-location installation explains the planning needed across several locations.
Installation quality also protects more than the physical graphics. Research on a major rebrand found that some identity changes affected brand liking and trust. A published study on consumer response shows why careful execution and clear communication both matter during a rebrand. Certification cannot remove every risk, but it adds checks, records, and accountability to the installation process.
What should your rebrand brief include?
A useful brief gives every partner the same plan before production starts. It should define the goal, scope, approved artwork, site limits, and launch date. It should also name who can approve changes when field conditions differ from the plan.
Brand and customer goals
Research on the impact of visual brand identity shows why the brief must explain the change, not just list new graphics. Define what customers should notice, which old brand elements must disappear, and how each space should support the new identity.
- What message should customers understand at first glance?
- Which logos, colors, fonts, and image files are final?
- Which signs or graphics must stay during the change?
- Will the launch include retail stores, pop-ups, or both?
Brand owners and agencies should attach a current style guide and approved art files. They should also mark any campaign copy with a fixed end date.
Sites, surfaces, and schedule
Operations managers need a complete location list, access details, and store hours. Each site entry should note wall, window, floor, and fixture surfaces. Add photos, sizes, known damage, removal needs, and any limits on noise or work hours.
- Which locations need a site survey before print production?
- Can crews work after hours or while the store is open?
- Who provides keys, permits, lifts, parking, and security access?
- Which stores need a phased launch or special sequence?
For a large rollout, use a shared status tracker and one approval path. AP Installations brings retail and pop-up project experience to site planning, crew scheduling, and field coordination. The multi-location installation checklist can help teams map those details.
Production and launch control
Print partners need exact files, finished sizes, quantities, materials, and delivery labels. The brief should state who checks proofs and who owns reprints. It should also define how crews report missing pieces, surface issues, or artwork errors.
- Has every artwork version received written approval?
- Do printed pieces match the location and install map?
- What photos must crews capture before and after installation?
- Who accepts completed work and records open items?
Set one pre-launch review with the brand owner, operations lead, agency, printer, and installer. Use it to confirm contacts, shipment status, site readiness, and the process for same-day decisions.
Request a retail graphics consultation before your rollout begins.
Frequently Asked Questions
What are retail graphics?
Retail graphics are visual elements used throughout a store to communicate its brand, promotions, and wayfinding. They can include vinyl window graphics, wall murals, floor graphics, dimensional logos, and seasonal displays. During a rebrand, these elements help create a consistent customer experience from the storefront through the sales floor.
What is an example of retail branding?
A coordinated store rebrand is one example of retail branding. It might pair a refreshed logo with matching window graphics, wall graphics, floor graphics, signs, and point-of-sale displays. Applying the same colors, typefaces, and messaging at each customer touchpoint makes the updated identity easier to recognize.
What is a vinyl graphics company?
A vinyl graphics company designs, prints, installs, or manages adhesive graphics for commercial spaces and vehicles. Some firms provide every service, while specialized installers coordinate with design firms and print shops. For retail rebranding, the installer should assess surfaces, confirm material compatibility, plan access, and document quality across every location.
Why are companies simplifying their logos?
Companies often simplify logos so the design remains clear across storefront signs, window graphics, websites, apps, and small digital screens. Fewer details can improve readability and make production more consistent across materials. However, a simpler logo should still preserve recognizable brand elements and be tested at the sizes used in each retail location.
Can a retail store stay open during vinyl graphics installation?
Yes, many retail stores can remain open while vinyl graphics are installed, depending on the work area and safety requirements. Installers may phase the project, isolate specific zones, or schedule work during evenings and weekends. According to AP Installations, off-hours scheduling can reduce disruption to normal retail operations.
Ready to Plan a Consistent Retail Graphics Rollout?
Delaying a retail rebrand can leave stores displaying mismatched graphics, outdated messages, and uneven customer experiences while competitors present a more unified image. Starting now gives your team time to align artwork, confirm each site’s needs, and build a realistic installation sequence before deadlines force rushed decisions. Early planning creates a clearer path from design approval to installation, helping every location prepare for the work and support a consistent brand presentation.
Waiting until launch dates are close can limit your options, add pressure for local teams, and make coordination harder across the full rollout. Ready to move forward? Request a retail graphics consultation to discuss your locations, desired timeline, and the steps needed to begin with confidence.