
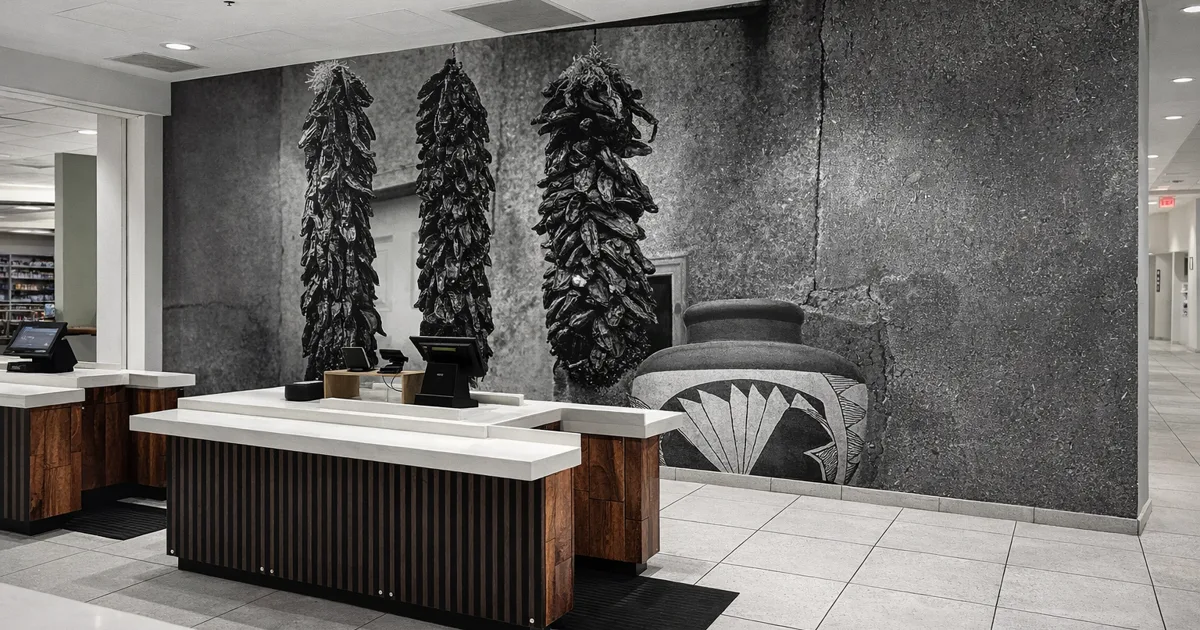
A seasonal restaurant promotion loses impact when guests reach the door and miss the pickup route. The strongest graphics turn each surface into one clear path from sidewalk to counter.
Restaurant window graphics installation turns seasonal campaign artwork into a coordinated guest path across promotional windows, entry decals, pickup-direction graphics, and interior floor graphics. A strong rollout maps each surface, checks the application area, schedules installation outside customer-facing hours, and plans removal before the next campaign. Each placement should support a specific job: attract attention, clarify the entrance, direct pickup traffic, or guide guests inside.
Restaurant teams still need to decide which surfaces carry the offer, where each cue belongs, and when installers can work without disrupting service. The process starts with a campaign map that connects those decisions.
Restaurant window graphics installation starts with a campaign map
A restaurant graphics campaign should begin with a simple map of each site. The map should show every window, door, vestibule, pickup point, and usable floor area. It should also show how guests approach, enter, order, wait, collect food, and leave. This keeps restaurant window graphics installation tied to the guest journey rather than a list of print sizes.
Guest paths before graphic locations
Start outside the restaurant and walk the path as a first-time guest. Note which windows face road traffic, parking spaces, sidewalks, and the main approach. Then mark the first door guests are likely to use. A promotion on a side window may need a different role than a decal placed at eye level near the entrance.
Next, walk the pickup path. Door decals can confirm the correct entrance. Small entry graphics can separate dine-in traffic from pickup traffic. Direction graphics near the counter can help guests find the handoff area. Floor graphics can support that path when they are placed where guests already look and walk.
A site-by-site surface list
Build a surface list for every restaurant, even when the offer stays the same across the group. Record window dimensions, door swings, handles, glass panels, interior partitions, floor surfaces, and nearby signs. Note where a decal could interfere with a menu board or a clear view through the entry. Window planning should consider light and comfort as well as visibility. Research on window design and occupant comfort shows why glass coverage decisions need care.
- Promotional windows: lead with the seasonal offer or campaign message.
- Doors and entry decals: confirm the entrance, hours, or pickup route.
- Pickup graphics: guide guests from arrival to the handoff point.
- Interior floors: reinforce direction or extend the campaign inside.
The list should also flag surfaces that need a closer review before production. A full storefront window, a narrow door lite, and a high-traffic floor each call for a different install plan. AP Installations can review these needs as part of its retail graphics solutions.
One campaign, separate location plans
Use one campaign brief, but keep a separate map for each restaurant. A drive-thru site, an urban storefront, and a food hall stall will not share the same guest path. The map helps the print team prepare the right pieces for each location. It also gives installers a clear sequence for windows, doors, pickup areas, and floors.
For floor placements, note the route, surface, and traffic pattern before print files are final. The guide to interior floor graphics explains how floor decals can add another brand surface. The campaign map keeps that surface connected to the rest of the restaurant experience.
Which graphic format fits each restaurant surface?
The right format starts with the job each surface needs to do. A street-facing window may promote a limited-time offer, while an entry door gives guests a quick instruction. Interior floors can guide movement or carry a brand detail after customers walk inside.
Match the message to the surface
Promotional window graphics suit bold menu launches, seasonal offers, and campaign art. For a larger storefront plan, restaurant window graphics installation can place the main message where people see it before they reach the entrance.
Material choice matters when the dining room needs daylight or some view through the glass. Research on window design notes the need to balance energy demand with occupant thermal comfort. This is useful when planning coverage near seats and sun-facing glass. See the window design study for the source.
Use entry and pickup decals for quick cues
Entry decals work best for short, fixed details such as hours, door identification, and basic arrival instructions. Pickup-direction decals should reduce doubt near the handoff area. Use brief copy, clear arrows, and placement that stays visible when a line forms.
These smaller decals are part of the guest path, not a second ad campaign. Keep promotional art on the window when possible. Reserve the door and pickup zone for information a guest needs at that exact point.
| Graphic format | Main purpose | Best placement | Planning consideration |
|---|---|---|---|
| Promotional window graphic | Feature an offer or campaign | Street-facing storefront glass | Check sightlines, light, and planned removal |
| Entry decal | Share arrival details | Main door or nearby glass | Keep copy readable at walking distance |
| Pickup-direction decal | Guide order collection | Entry path, counter, or handoff zone | Test visibility when guests queue |
| Interior floor graphic | Support wayfinding or branding | Indoor path or service area | Plan for foot traffic and safe removal |
Plan interior floor graphics as part of the route
Floor graphics add a useful layer when wall and window space already have a clear role. They can mark a pickup route, support a campaign, or reinforce the brand inside. Review interior floor graphics when mapping that indoor layer.
Plan each format as one part of the same route. Start outside, move through the entry, then follow the guest path to ordering and pickup. That sequence keeps the graphics useful and prevents competing messages.
Build a realistic seasonal campaign installation timeline
Plan around the campaign date
A seasonal launch needs a clear path from brief to removal. Start with the date guests should see the promotion, then work backward with your installer and print partner. This keeps restaurant window graphics installation tied to operations instead of a rushed final handoff.
Share the offer, locations, window areas, target launch date, and planned end date at the start. A strong brief also notes dining hours, delivery windows, site contacts, and any access limits. For more background on options, review this guide to installing seasonal promotional graphics.
Six checkpoints for each location
Use the same checkpoints for one restaurant or a multi-location rollout. The length of each stage will change with the artwork, material, window layout, and site access. Build room for review instead of relying on an unverified rush promise.
- Set the campaign brief. Confirm the promotion, artwork owner, launch date, end date, locations, and the person who can approve changes. Note whether each restaurant will stay open during installation.
- Confirm each site. Check window measurements, glass condition, placement, indoor or outdoor application, and access needs. Flag door swings, window seams, nearby fixtures, and guest traffic paths before production starts.
- Release production-ready files. Match approved art to the confirmed dimensions and material plan. Keep location names and window positions clear so each graphic reaches the correct restaurant.
- Schedule the installation window. Choose off-hours work when possible to reduce disruption for staff and guests. Confirm arrival instructions, parking, entry, alarm steps, and the on-site contact before the crew arrives.
- Inspect the finished work. Review placement, edges, seams, and the overall look from inside and outside. Record any issue by location so the right team can resolve it without guesswork.
- Plan removal or replacement. Put the end date on the schedule before launch. Confirm whether the next campaign follows right away and how removed graphics should be handled.
Site details that prevent surprises
Material choice belongs in the site review, not at the last minute. Window treatments can affect light and comfort. Window design involves a balance between energy demand and thermal comfort. A research article in the National Library of Medicine archive explains that balance.
The schedule should also leave space for clean glass and a final check. Surface prep, access, and removal planning are part of the job, not add-ons after printing. For seasonal restaurant promotions, a repeatable process makes restaurant window graphics installation easier to manage across every location.
How do you plan graphics for high-traffic restaurant areas?
Durability planning starts with the path guests already use. Map the entrance, host stand, pickup shelf, queue, and main walkways before choosing graphic locations. A restaurant window graphics installation should support that path, not add clutter where guests pause or staff carry orders.
Entrance glazing conditions
Check every entrance pane before installation. Record residue, chips, old adhesive, and areas touched often by guests or staff. Glass must be cleaned well and kept free of debris before a decal is applied, according to this window decal preparation guidance.
Also note how the entrance works during a normal shift. Watch the door swing, line formation, curbside pickup flow, and clear views needed at the doorway. The graphic plan should leave key sightlines open. This is also the right time to review whether the cleaning team wipes the inside, outside, or both sides of each pane.
Floor graphics along the guest path
Interior floors need a separate placement review. Look for worn areas, uneven surfaces, seams, and spots that receive frequent cleaning. Then mark the routes used by dine-in guests, delivery drivers, and employees. AP Installations provides more planning context for interior floor graphics.
Place floor graphics where people can read them without stopping in a doorway or a tight aisle. Avoid putting a message where a line could block another guest’s route. The aim is simple: use the available space while keeping the path easy to follow.
Compare possible placements during the busiest part of the shift. A quiet dining room can hide conflicts that appear when guests queue, staff restock, and drivers wait for pickup. Use those observations to adjust the layout before installation begins.
- Confirm that the surface is clean, sound, and ready for installation.
- List each area’s cleaning routine and how often staff service it.
- Mark door swings, turns, queue points, and pickup handoffs.
- Schedule installation when the crew can work without guest traffic.
Placement, comfort, and upkeep
Entrance graphics can shape more than the view from the sidewalk. Research on window design describes the need to balance energy demand with occupant thermal comfort. For restaurant glazing, note sun exposure and seating near the glass before final placement decisions.
Build upkeep into the plan before installation day. Give managers a location list, cleaning notes, and a way to report lifting, wear, or damage. For seasonal graphics, include a removal window and the next install date. That keeps each update tied to restaurant operations instead of treating removal as an afterthought.
Install outside customer-facing hours without disrupting service
Planning around the service window
Restaurant window graphics installation should fit the operating schedule, not compete with it. The project plan can set a work window after the final rush or before opening. It should also name the site contact, access point, and areas that must stay clear.
This planning matters in a restaurant because the team may still be closing the dining room or preparing the kitchen. Installers can confirm when each window becomes available and sequence the work around staff tasks. A clear plan keeps the install separate from customer-facing service.
Site access and a safe sequence
Before work starts, the restaurant team and installer should confirm entry, alarm steps, lighting, and any restricted areas. They should also agree on where tools and removed material can be staged. That keeps paths clear for staff who are still on site.
- Start with the windows that are fully clear and easy to reach.
- Move through the storefront in a set order so no panel is missed.
- Record any glass issue that needs review before a graphic is applied.
The scope should note how much glass each graphic covers. A peer-reviewed study of window design explains that energy demand and occupant thermal comfort must be balanced. That makes coverage, light, and the view from inside useful handoff notes.
Consistent handoff across locations
Multi-location campaigns need one repeatable checklist. Each restaurant should receive the same notes for access, panel order, safety checks, and final review. The installer can log completed windows, flag site-specific issues, and send completion photos to the project team.
The handoff should also cover the next campaign change. This is useful when a restaurant is installing seasonal promotional graphics on a set calendar. A removal plan helps the next update start with the right access notes and a clear record of the current display.
For restaurants planning a broader storefront program, a dedicated restaurant window graphics installation process keeps scheduling and review steps consistent. The result is a cleaner rollout without adding avoidable pressure during service hours.
What should restaurants plan before seasonal graphics come down?
Temporary promotions need an exit plan before the first panel goes up. During restaurant window graphics installation, record the campaign end date, site contact, access rules, and expected removal window. This keeps a seasonal display from becoming an operations afterthought when the next promotion is ready.
Removal dates and access windows
Put the planned removal date on the campaign calendar and share it with each location manager. Build the work window around quieter service periods, deliveries, and opening tasks. If graphics span entry doors, keep a clear guest path while crews work.
For multi-location campaigns, list the order of stores and the person who confirms access at each site. Align that schedule with your plan for installing seasonal promotional graphics so installation and removal stay paired. Note where tools can be staged and whether a manager must be present.
Surface records and removal order
Start a condition record before application. Photograph each pane, frame edge, door, and nearby fixture. Mark existing chips, scratches, worn seals, or old adhesive so the post-removal review has a clear baseline.
Set a removal order for the crew. Clear door graphics first when they affect access, then work through fixed panes in a steady sequence. Group panels by area and note whether each graphic sits on an interior or exterior surface.
Material choice also belongs in the removal plan. Different window graphic types call for different handling, especially when a promotion has stayed up through changing weather. A window graphics installation scope should identify the material and surface before work starts.
Post-removal review
Review every pane after removal. Look for adhesive residue, missed edges, surface marks, or areas that need cleaning. Take close photos and wider storefront photos, then compare them with the condition record.
This review is not only cosmetic. Research on energy-efficient window design notes the need to balance energy demand and occupant thermal comfort. A clear glass check helps teams route any window issue for separate follow-up instead of burying it in the campaign closeout.
Finish with a simple site sign-off. Record the removal date, reviewed panes, open cleanup items, and person who accepted the work. That record gives operations teams a clean handoff before the next seasonal message arrives.
Keep multi-location restaurant promotions consistent
One brief, one readiness checklist
A multi-location rollout needs one campaign brief and a site record for each restaurant. The brief should set the approved artwork, material, finish, placement rules, install window, and removal plan. Each site record should note the glass dimensions, pane layout, door swing, frames, seals, old graphics, access notes, and store hours.
Use recent photos and measurements before production starts. Mark each graphic with its restaurant, pane, orientation, and install order. That approach gives the installer a clear map while keeping the brand presentation aligned across the campaign. It also supports cleaner planning for restaurant window graphics installation.
Consistent standards, site-specific decisions
Consistency does not mean forcing the same layout onto every storefront. A corner restaurant may have narrow panes, while another location has a wide entry bay. Set fixed brand rules for logo scale, color use, promo hierarchy, and viewing direction. Then map the approved creative to each glass layout.
Review how each window plan affects the dining space. Window design must balance energy demand with occupant thermal comfort, according to a study indexed by the National Library of Medicine. Record any site needs that could change material choice or coverage, such as direct sun, interior sightlines, or the need to keep key views open.
Proofing and closeout across locations
Before installation, route a location proof for approval. It should show the storefront photo, pane numbers, graphic dimensions, placement notes, and any planned exceptions. Keep the approved proof with the install packet so the field team can check placement on site.
After each install, collect completion photos from the same useful angles. Compare them against the proof and log any change before the next location begins. This makes small issues easier to catch early, from an offset logo to a graphic assigned to the wrong pane.
For seasonal campaigns, add the removal date and next-promotion handoff to the tracker. If you need help planning a repeatable multi-location rollout, contact AP Installations before production begins.
Frequently Asked Questions
How much does restaurant window graphics installation cost?
Restaurant window graphics installation cost depends on the number of locations, glass dimensions, material, access conditions, and removal needs. A simple entry decal requires less labor than a full storefront campaign with several panels. Interior floor graphics and pickup-direction decals also add surfaces to the scope. Ask for a site-specific quote that covers installation timing and planned removal.
How do I install perforated window decals?
Start with clean, dry glass, measure the placement, and align each panel before applying pressure. Use a squeegee to work gradually across the decal and reduce bubbles. Perforated decals are commonly applied to exterior glass and can be removed later, according to Signs By Tomorrow. Large panels and multi-location campaigns are better suited to professional installation.
Can custom window decals be used indoors?
Yes. Custom window decals can be installed on interior glass, including entry partitions and windows facing dining or pickup areas. Interior decals can support seasonal promotions, wayfinding, and branded messages without using exterior glass. Signs By Tomorrow notes that indoor glass surfaces can be used for product and service messaging.
Will window graphics block out natural light?
Not always. The effect depends on the material, print coverage, and placement. Opaque graphics block more light, while perforated film can show promotional artwork outside and retain a see-through, sunshade-like view inside. That feature is described by Smartpress. Review dining-area light needs before choosing material for a seasonal campaign.
How can I prepare my restaurant windows for graphics installation?
Confirm the installation area, remove nearby displays, and make the glass easy to reach before the crew arrives. The surface should be cleaned thoroughly and kept free of debris before application, as Smartpress explains. Schedule work during off-hours when possible so installers can handle entry decals and storefront panels without disrupting guests.
Ready to plan your seasonal graphics rollout?
Delaying a seasonal graphics rollout can force window decals, pickup-direction graphics, floor graphics, installation timing, and removal planning into the same tight window. Starting now gives your team room to align campaign dates with restaurant operations and resolve location details before installation begins. With more lead time, your team can confirm each placement, set the off-hours sequence, and prepare removal steps before the campaign ends.
Ready to plan your next promotion? Early coordination can make the rollout easier to manage from installation through removal. That head start keeps your team focused on the campaign instead of avoidable scheduling gaps. A clear start also leaves room to address questions before rollout day. Request an estimate from AP Installations to schedule your restaurant graphics installation and removal coordination.