
Confusing navigation in a public facility is more than an inconvenience; it is a safety risk. Strategic campus wayfinding graphics installation organizes large environments and guides visitors to their destinations with confidence.
Request a certified campus wayfinding graphics installation quote from AP Installations.
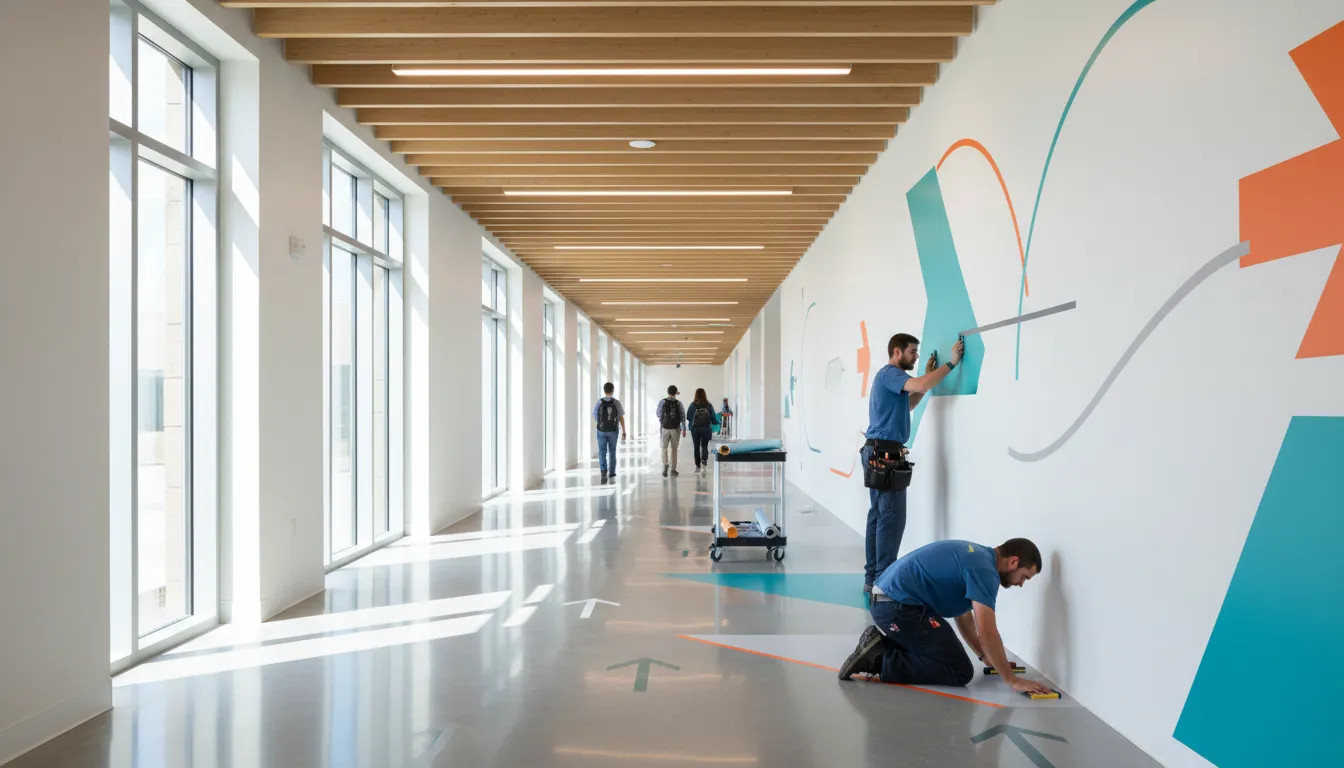
A professional campus wayfinding graphics installation requires a comprehensive strategy that prioritizes durability, visibility, and legal compliance across diverse surfaces. This process involves selecting high-performance vinyl materials that withstand UV exposure and heavy traffic while maintaining clear directional paths. Installers coordinate with facility managers to ensure graphics meet 2010 ADA Standards, which mandate specific contrast levels and tactile requirements in public spaces. Effective installations are executed in phases to minimize disruption to academic schedules and daily facility operations. By using 3M-certified application techniques, installers ensure directional graphics adhere properly to challenging substrates like brick and concrete. A successful installation provides a seamless navigation experience that enhances safety across the facility.
Managing the logistics of a graphics project requires coordination between administrators and certified installers. The process for a successful campus wayfinding graphics installation starts with a clear site plan, which ensures signs are placed for maximum visibility.
Campus wayfinding graphics installation starts with a clear site plan
Good campus wayfinding graphics installation needs more than just high-quality prints. It starts with a deep dive into the physical layout of the grounds. Facilities teams must provide accurate campus maps and current building names before any vinyl goes on a wall. This data helps our team know the destination hierarchy. We need to see where the main entries are and which parking lots serve which buildings.
Mapping visitor routes and hierarchy
Wayfinding is about guiding people from point A to point B without confusion. To do this well, we look at the paths visitors take. This includes pedestrian flow during peak hours, like class changes or major events. We also consider the needs of diverse groups. This includes students, staff, and first-time visitors who may be in a rush. Inclusive design ensures that all members of the campus community can navigate with confidence. By thinking about every type of user, we create a system that works for everyone.
Effective signage also relies on a clear hierarchy of information. We start with large landmarks and move down to small room numbers. This flow builds trust with students and staff. When everyone knows where to go, the campus feels organized. Consistent branding across these paths helps unify the visual style of older and newer buildings.
Identifying installation areas and approvals
Once we have a map, we need to pick the exact spots for each graphic. A thorough site survey is the first step in this process. We look at surface types like brick, concrete, or glass. Surface texture is a key factor in how we plan. Brick and other porous surfaces need specific prep techniques to ensure long-term vinyl adhesion. Our team tests the bond of the material before the full project begins. This extra step prevents peeling or failure in high-traffic zones.
Stakeholder approval is another big part of the planning phase. Facilities managers and school leaders must agree on the final plan. This avoids costly changes later. We often recommend a phased schedule for large projects. This keeps the campus running smoothly while we work. We coordinate around the academic calendar to avoid busy exam weeks or graduations. We also check for weather factors. Outdoor vinyl can crack if it faces too much sun or rain.
How installation differs from design only plans
Many firms focus only on how a sign looks. While design is vital, a professional installation is what makes it last. There is a big difference between a design file and a finished product on a wall. For example, large outdoor panels must account for wind loads. We also ensure that every sign meets the 2010 ADA Standards for public buildings. This includes checking character heights and contrast levels.
A certified installer brings technical skill that designers might miss. We understand how different vinyl grades perform in the local climate. Using a UV-protective laminate is often necessary to prevent fading from light exposure. Proper campus wayfinding graphics installation ensures that your system serves your school for years to come.
Which campus surfaces work best for directional vinyl graphics?
Selecting the right surface is the first step in any campus wayfinding graphics installation project. Academic facilities use a wide mix of materials, from historic brick to modern glass and steel. Each material reacts differently to vinyl adhesives. A professional installer must evaluate the texture, porosity, and finish of a wall before the first graphic is applied. Proper matching between the film and the substrate ensures the directional signs remain legible and secure for years.
Interior wall and window surfaces
Most school interiors consist of painted drywall or smooth plaster. These surfaces are generally easy to work with, but the type of paint matters. Modern “low-VOC” or “scrubbable” paints often contain additives that repel adhesives. These coatings can cause the bond to fail. This results in graphics that peel or lift shortly after application. A 3M Preferred Installer will usually perform a quick adhesion test to confirm the bond strength. This step prevents costly failures in high-traffic corridors where students might bump or brush against the signage.
Smooth surfaces like glass and metal are also common in university student centers. Glass is an excellent substrate for certified installer graphics because it is non-porous and easy to clean. But these applications require precise handling. Proper care prevents bubbles or trapped dust. Installers often use frosted or translucent films for windows or glass entryways. These films provide information without blocking natural light. They also offer high durability while maintaining a professional look across the facility.
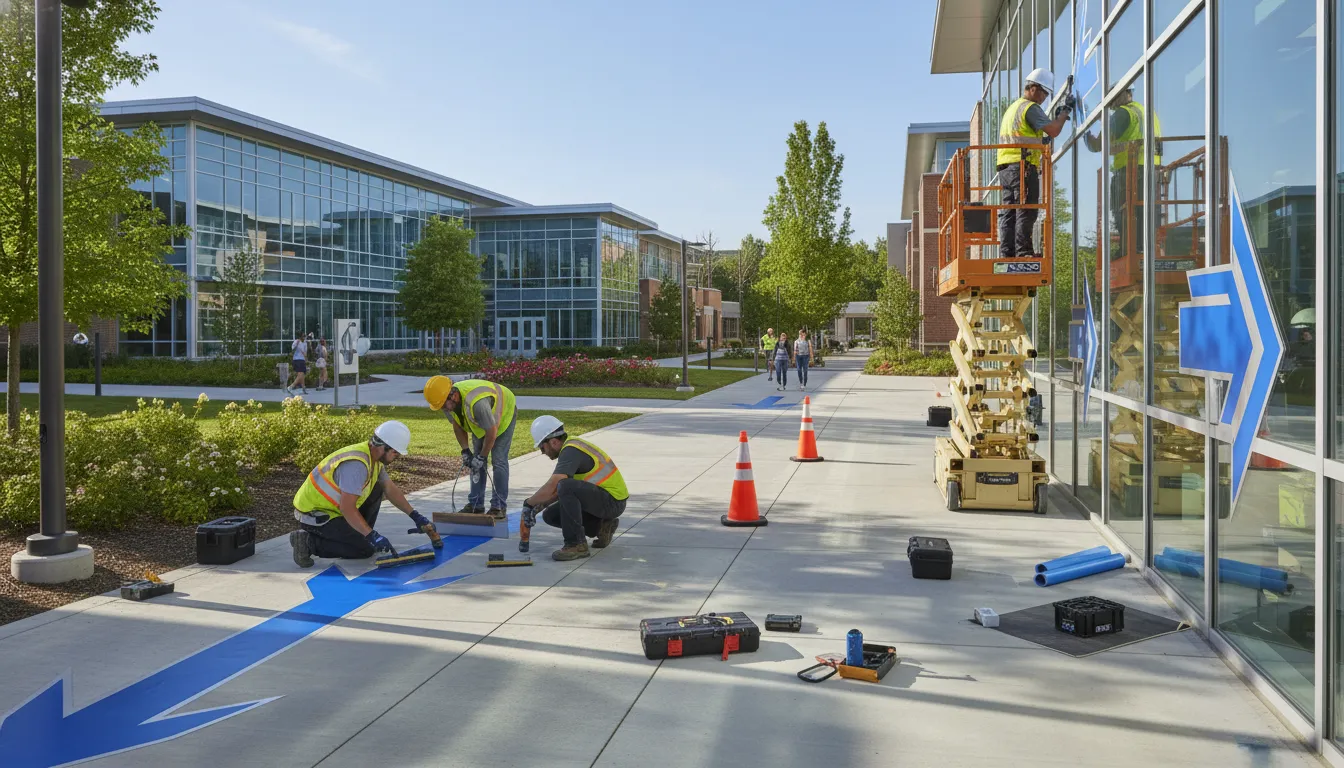
Exterior materials and weather factors
Exterior campus wayfinding presents more challenges due to environmental stress. Materials like brick, stone, and sealed concrete are porous and uneven. These surfaces require specialized cast vinyl that can be heat-molded into the texture of the wall. Without this technical approach, moisture can seep behind the film. Over time, this leads to the degradation and cracking of the material, especially in regions with frequent rain or extreme temperature shifts.
UV exposure is another critical factor for outdoor graphics. Sunlight can fade colors and weaken adhesives in a few months if the wrong materials are chosen. To prevent this, installers use UV-protective laminates to maintain color vibrancy. These laminates act as a shield against harsh light and pollutants. When planning a campus wayfinding graphics installation, facility managers should also consider the position of the building. South-facing walls will likely need higher-grade materials to withstand the increased sun exposure.
| Surface Type | Prep Level | Durability | Best Use Case |
|---|---|---|---|
| Painted drywall. | Low. | High indoors. | Classroom wings and office hallways. |
| Glass. | Low. | High. | Main entrances and suite identification. |
| Sealed concrete. | Medium. | Medium-high. | Floor directional cues and parking garages. |
| Brick or stone. | High. | Medium. | Building identification and exterior paths. |
| Metal panels. | Medium. | High. | Wayfinding kiosks and stadium signage. |
Testing and compliance in high-traffic areas
In busy campus areas, graphics face constant physical contact. Corridors in middle schools and high schools are highly demanding. Before starting a full-scale installation, a thorough site survey finds the best locations for durability. Installers check for moisture issues in the walls and ensure the surface temperature is within the safe range for the adhesive. Crew members clean the surface with isopropyl alcohol and water first. This removes oils and dust that might block a strong bond.
Accessibility is the final piece of the surface selection puzzle. Any directional signage must follow the 2010 ADA Standards for mounting heights and visual contrast. If a wall is too heavily textured, it might not support the tactile elements or Braille required for compliance. In these cases, installers may recommend a backing panel to provide a smooth, compliant surface for the vinyl. This combined approach ensures the campus is easy to navigate for everyone. It also maintains the integrity of the building materials.
Where does ADA coordination fit into a campus graphics install?
Planning a campus wayfinding graphics installation involves many moving parts. One of the most vital steps is making sure all signs meet federal rules. The 2010 ADA Standards set specific needs for new and altered public buildings. These rules help make sure that every student and visitor can find their way safely. While our team does not give legal advice, we work with your architects to install your approved designs with care.
The role of an expert installer
As a 3M Preferred Installer, our job is to follow your technical plans with great detail. We handle the work of putting up tactile signs, Braille, and directional vinyl. Full ADA compliance for signage requires following strict rules for letter height and mounting spots. We use our skills to make sure your signs stick to surfaces like brick or concrete. This work helps you avoid mistakes during the final check of the project.
Using visual accessibility rules
Clear sight is just as vital as the spot where you put a sign. ADA rules often call for high contrast levels between text and backgrounds to help people with low vision. When we look at a site, we help see if your materials will work on the walls. For example, some wall textures might change how a vinyl graphic looks in the light. We help your team pick the right vinyl grade so the signs stay easy to read for a long time.
Working with your team
Good projects rely on a clear path between the designers and the installers. We do not design the wayfinding system or act as your legal expert. Instead, we act as the bridge that turns those plans into a reality on your walls and floors. We plan our work around the school calendar to keep from getting in the way. By working with your code experts, we make sure every part of your commercial vinyl graphics installation meets the high standards needed for a campus.
How phased installation keeps campuses open during upgrades
Updating directional signs on a busy school or college site takes careful timing. Large projects often disrupt daily life if they are not planned well. A phased approach allows a certified installer to work in sections. This method ensures students and staff can still move around the site safely while new graphics are applied.
Coordinating with academic calendars
Success starts with matching the work to the campus schedule. Most large upgrades happen during summer breaks or long holidays when fewer people are around. For year-round sites, teams often work on weekends or in the evenings. Certified teams also check the campus event list to avoid high-traffic days like graduation. This level of campus wayfinding graphics installation planning keeps the focus on learning rather than construction noise.
Facilities teams managing warehouses, production areas, or logistics zones can also review industrial facility wayfinding graphics for safety-focused directional planning.
Managing active navigation during work
When one part of a campus is under construction, navigation can become difficult. Installers use temporary wayfinding signs to guide people around closed areas. These temporary tools ensure that ADA accessibility standards are still met even during the upgrade. Facilities teams often get weekly updates so they can share changes with the public. This clear talk helps prevent confusion for visitors and new students.
Phased installation process steps
- Initial site survey: Experts walk the campus to find the best spots for every sign and check all surface types.
- Detailed project sequencing: The team builds a step-by-step plan that follows the school calendar and prioritizes high-traffic zones.
- Section-by-section application: Installers complete one building or area at a time to limit the footprint of the work.
- Temporary sign placement: Crews put up short-term directional tools to keep people moving safely around active work zones.
- Final punch list review: Project managers check every installed graphic for proper adhesion and alignment before moving to the next phase.
Ensuring durability in high-traffic zones
Public spaces require materials that can handle constant use and weather. High-quality vinyl works best for exterior walls and windows. These materials resist fading from the sun and cracking from heat or rain. A professional team will also use UV-protective layers to keep colors bright for years. Using the right ADA compliant wayfinding signage ensures the system remains useful for everyone who uses the site.
Why a certified installer matters for multi-building wayfinding
Managing navigation across a large facility requires more than just high-quality signs. Large projects like campus wayfinding graphics installation involve many surfaces and strict legal rules. Working with a certified installer ensures that your graphics last for years without peeling or fading. AP Installations has been a 3M Preferred Installer since 2008. We specialize only in installation, which lets us focus on quality control and perfect application.
Surface prep and material durability
Different buildings often have different exterior surfaces, from smooth glass to porous brick or concrete. A certified team knows how to prepare these surfaces so the vinyl sticks properly. According to the National Institute of Standards and Technology, outdoor vinyl can crack when exposed to sun, heat, and rain. We use technical knowledge to choose the right materials and prep methods for each unique surface. This careful approach prevents failure and protects your investment in campus signage.
Meeting accessibility standards
Wayfinding is not just about showing the way. It must also be accessible to everyone. The 2010 ADA Standards set specific rules for public facilities to help people with disabilities. This includes requirements for character height, contrast levels, and mounting positions. Our team understands how to install ADA compliant wayfinding signage that meets these legal needs. By following these rules, you reduce risk and make your campus more inclusive for all visitors.
Phased scheduling and project coordination
Large installations can be loud or block busy walkways, which might disrupt daily activities. We plan our work around your schedule to minimize these issues. This often involves phased installations that happen during breaks or low-traffic hours. Our team coordinates with facility managers to ensure that navigation stays fluid while we are on-site. This specialized focus helps us handle the complex logistics that general sign vendors might miss.
What should facilities teams prepare before requesting a quote?
Getting a precise quote for a campus wayfinding graphics installation requires more than a simple headcount of signs. A 3M Preferred Installer needs to understand the physical environment and the project scope to build a reliable timeline. When you prepare a detailed site package, you help our team provide a quote that accounts for every technical detail without hidden costs.
Gather campus maps and site surveys
The foundation of a successful project starts with a detailed visual map of your facility. You should provide campus maps that mark every entrance, major walkway, and key building. A campus wayfinding graphics installation often involves a deep hierarchy of signs, from large entry monuments to small directional decals. Providing a site survey helps us find the best spots for these signs to manage student traffic during busy transit times.
A thorough site survey also uncovers potential installation hurdles early. Knowing which areas see the most traffic helps us plan for phased schedules that minimize disruption to campus life. We use these maps to coordinate our work around the academic calendar. This step ensures that move-in days and graduation ceremonies remain clear of tools and ladders.
Document surface types and access limits
Vinyl graphics behave differently on various materials, so you must document the surfaces used across your campus. Take photos and notes of the walls where you plan to install graphics. Professional installers need to know if they are applying vinyl to smooth glass, painted drywall, or porous brick. Each surface requires specific prep work and certified installer expertise to ensure the vinyl sticks correctly for the long term.
You should also list any physical access limits or safety requirements for each location. Some installs may need high lifts for exterior wall murals. Others might be in narrow hallways with strict ADA height rules. According to the 2010 ADA Standards, public facilities must follow specific technical rules to remain accessible. Knowing these site constraints early allows us to bring the right tools for a safe, compliant job.
Define design files and install windows
Clear project goals and ready-to-use design files speed up the quoting process. You should pick out your brand colors, fonts, and any specific logos that must appear on the signage. Consistent branding across campus builds trust and helps people find their way with less stress. If you already have design files, sharing them allows us to check if the graphics need UV-protective laminates or reflective vinyl for better night visibility.
Finally, set your preferred install windows. Many colleges prefer to have work done during spring break or summer sessions when student foot traffic is low. We can plan a phased rollout that fits your budget and timing. When you reach out to request a certified installer quote, having these dates and files ready ensures we can start your project on the right foot.
Frequently Asked Questions
What is included in a campus wayfinding signage system?
A comprehensive system includes directional signs, identification markers, and informational graphics. These elements guide students from parking areas to specific buildings or departments. Effective systems use a clear structure to organize complex public spaces. This ensures that visitors can navigate large facilities with confidence. High-quality vinyl graphics are often used to unify the visual identity of both old and new campus structures.
What are the best materials for durable directional campus signage?
Premium weather-resistant vinyl is the most effective material for long-term outdoor use. These films often require UV-protective laminates to maintain color vibrancy and resist fading. According to the National Institute of Standards and Technology, environmental stressors like sunlight and rain can degrade outdoor materials over time. Using high-grade cast vinyl ensures the signage remains readable despite constant exposure to heat and pollutants.
Why is custom wayfinding signage important for campuses?
Installing custom graphics helps unify the aesthetic across diverse architectural styles. Consistent branding and typography reinforce user trust and make navigation more intuitive. Professional installation ensures that these custom elements adhere properly to various surfaces like brick or concrete. This consistency helps visitors and students recognize pathfinding cues quickly. Proper installation allows institutions to meet specific safety and accessibility standards while maintaining their unique brand identity.
How is exterior wayfinding signage typically installed?
Professional installers begin with a thorough site survey to identify optimal placement. The process involves precise surface preparation to ensure proper vinyl adhesion on materials like masonry or metal. Phased installation schedules are often used to minimize disruption to academic operations. This allows the work to proceed without interrupting campus events or daily classes. Teams coordinate with facilities managers to ensure that every graphic meets ADA mounting height requirements.
For a broader overview covering both corporate and education campuses, see our Wayfinding Signage Installation Guide for Corporate and Education Campuses.
Ready to improve your campus wayfinding navigation?
Leaving campus navigation to chance often leads to frustrated visitors and increased safety risks that are difficult to manage during peak transit hours. Delaying your directional graphics project can result in higher costs if you have to rush installations or fix compliance errors after a failed inspection. By starting your project today, you gain the timeline benefit of planning a phased rollout that works around your specific academic calendar and graduation schedule. Our 3M certified installation team provides the technical expertise needed to ensure every vinyl graphic adheres perfectly to various campus surfaces like brick and concrete. We handle the complex ADA coordination boundaries so your institution remains fully accessible and professional in appearance for years to come. This professional application protects your long-term investment from the constant wear and tear of a high-traffic public environment.
Ready to improve your campus navigation? Request a certified installer quote to talk to a certified professional.